Okta Integration with Cognito using SAML
Last updated: June 2, 2026
How to Create a SAML App in Okta
Access Okta Developer Console: Log in to the Okta Developer Console using your account credentials.
Navigate to Applications: In the navigation menu, locate and expand the "Applications" section, then choose "Applications".
Create App Integration: Click on the "Create App Integration" button to initiate the process of creating a new application integration.
Choose SAML 2.0 Sign-in Method: From the options provided, select "SAML 2.0" as the sign-in method for your app integration, and then click "Next" to proceed.
Configure SAML Integration for Your Okta App: Follow the on-screen instructions to configure the SAML integration for your Okta app, as outlined below.
Steps to Configure SAML Integration for Your Okta App
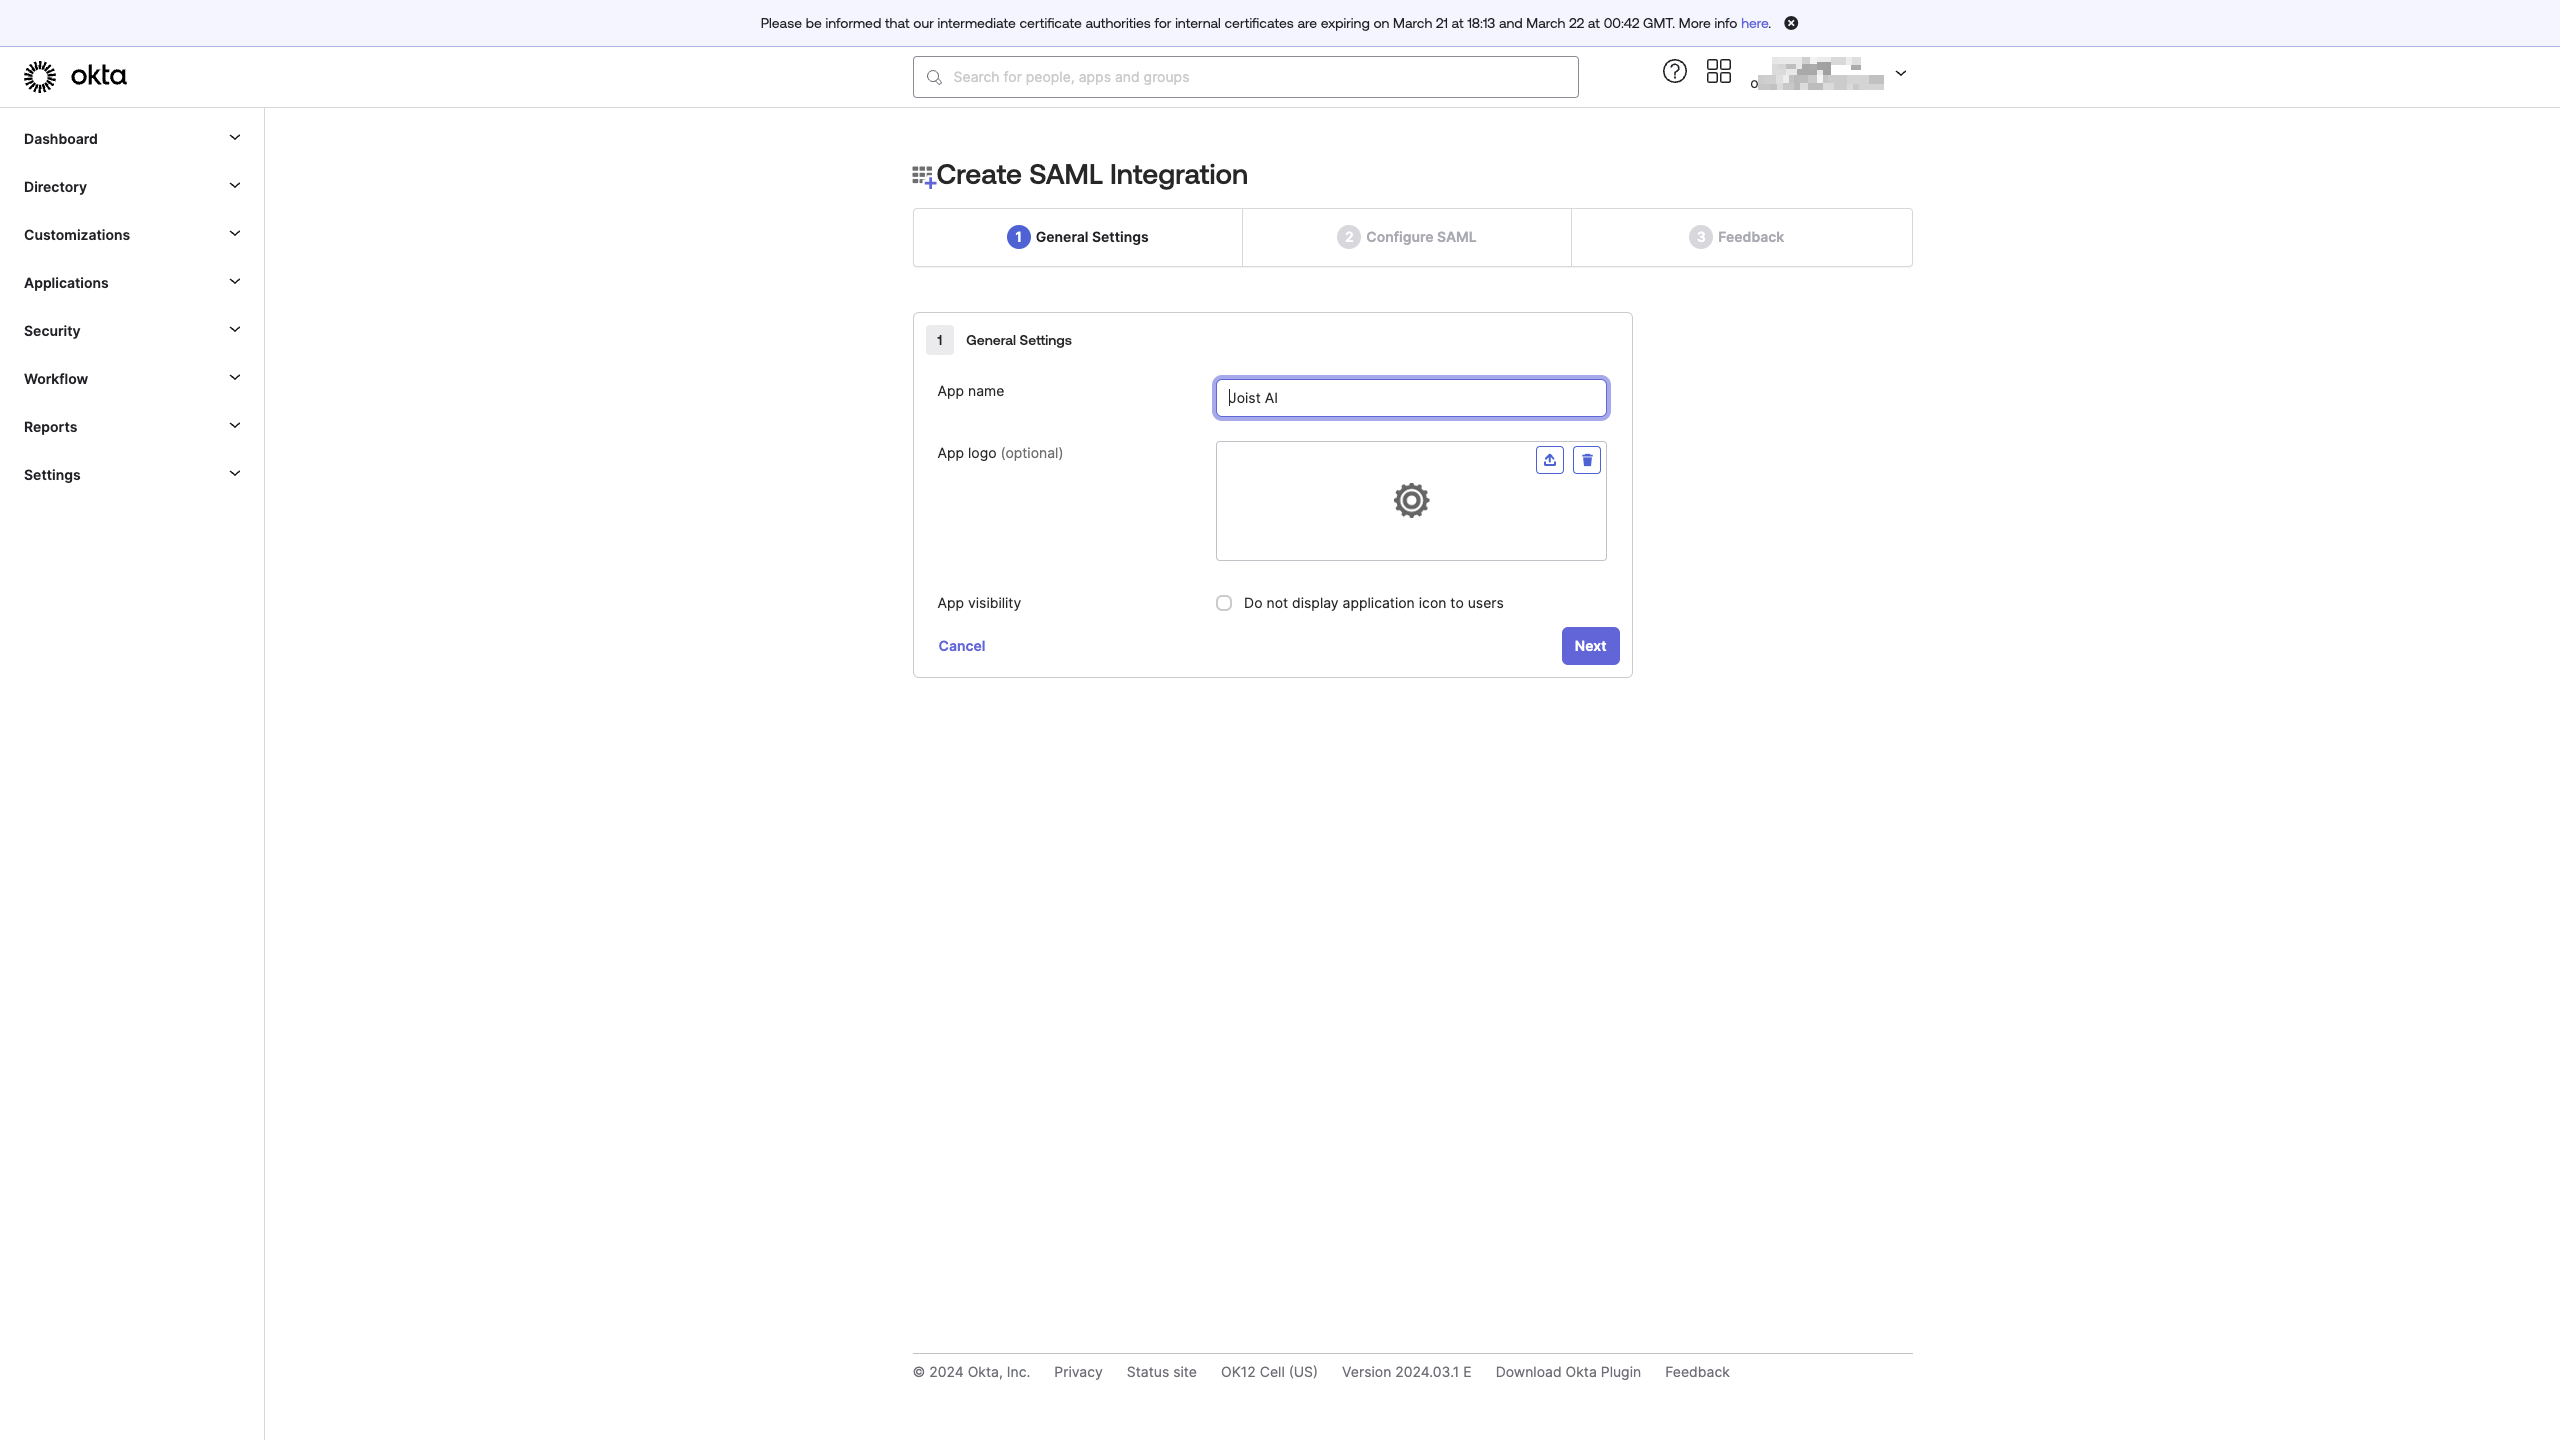
General Settings:
Enter a name (eg: Kantiv) for your app in the designated field.
Optionally, you can upload a logo and adjust visibility settings.
Click "Next" to proceed.
Single Sign-On URL:
For "Single sign on URL", enter:
https://auth.joist.ai/saml2/idpresponse.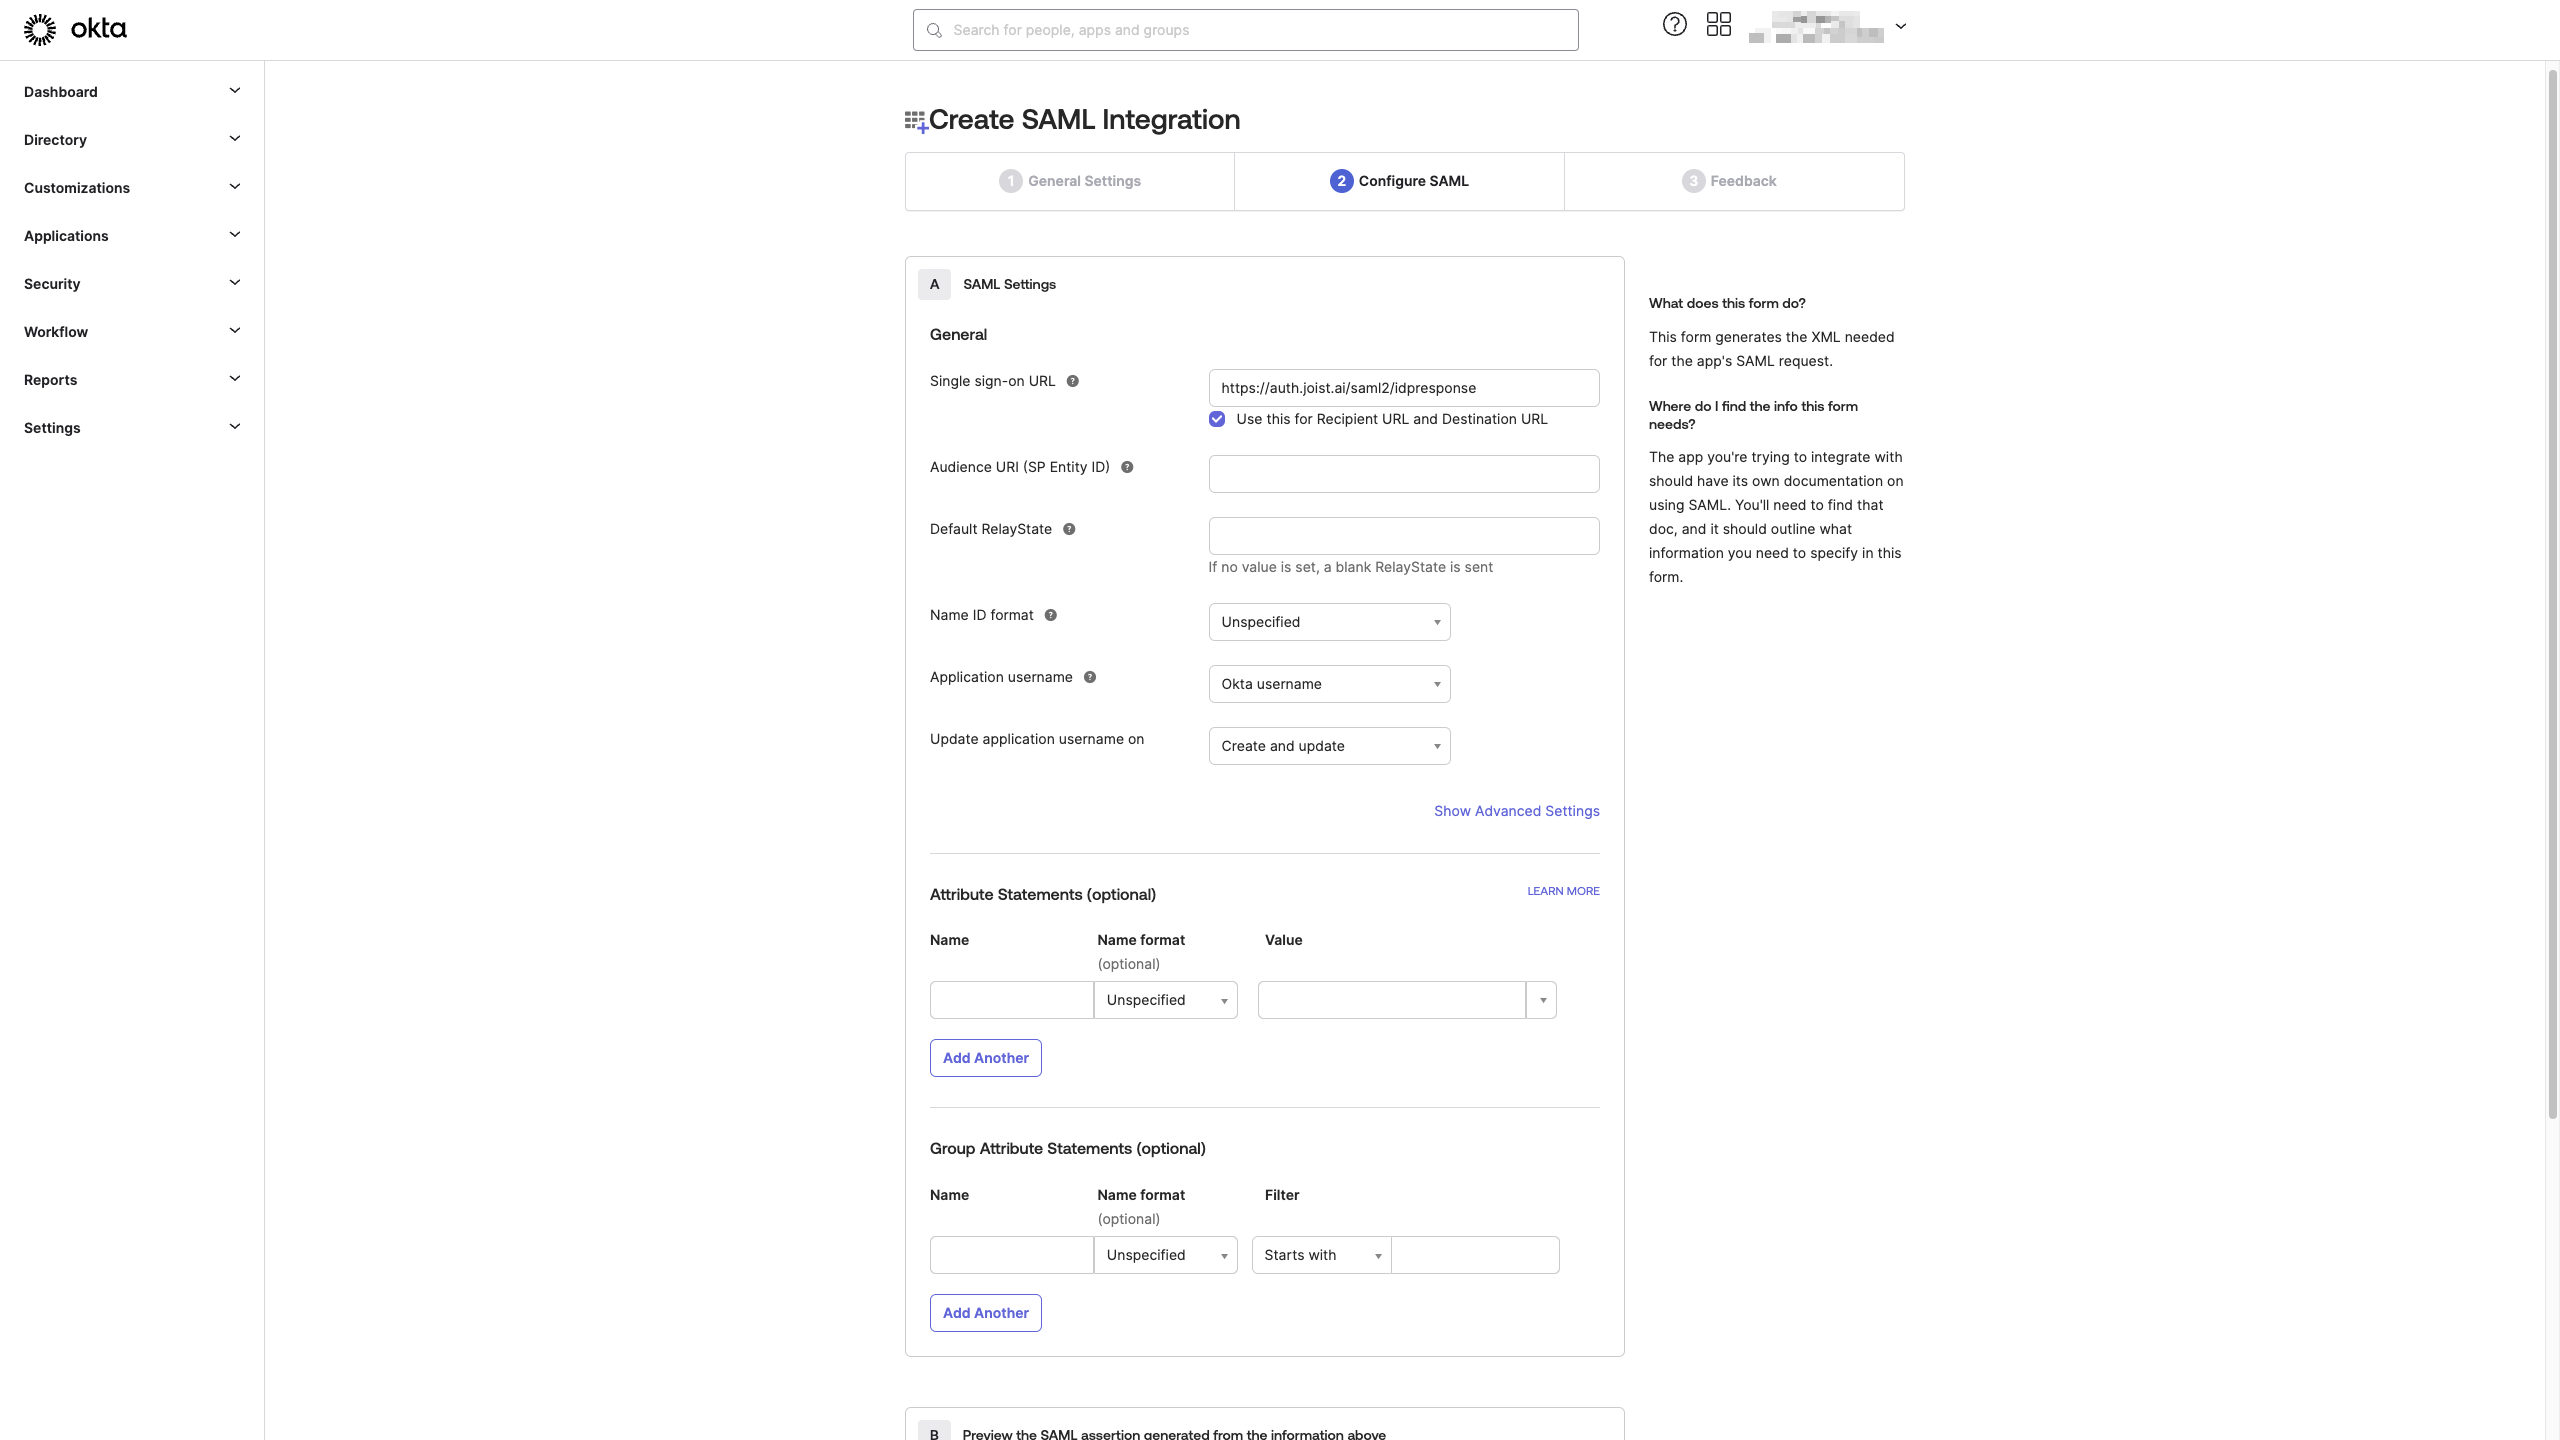
For "Audience URI (SP Entity ID)", enter:
urn:amazon:cognito:sp:us-east-1_Jvc36Bm58.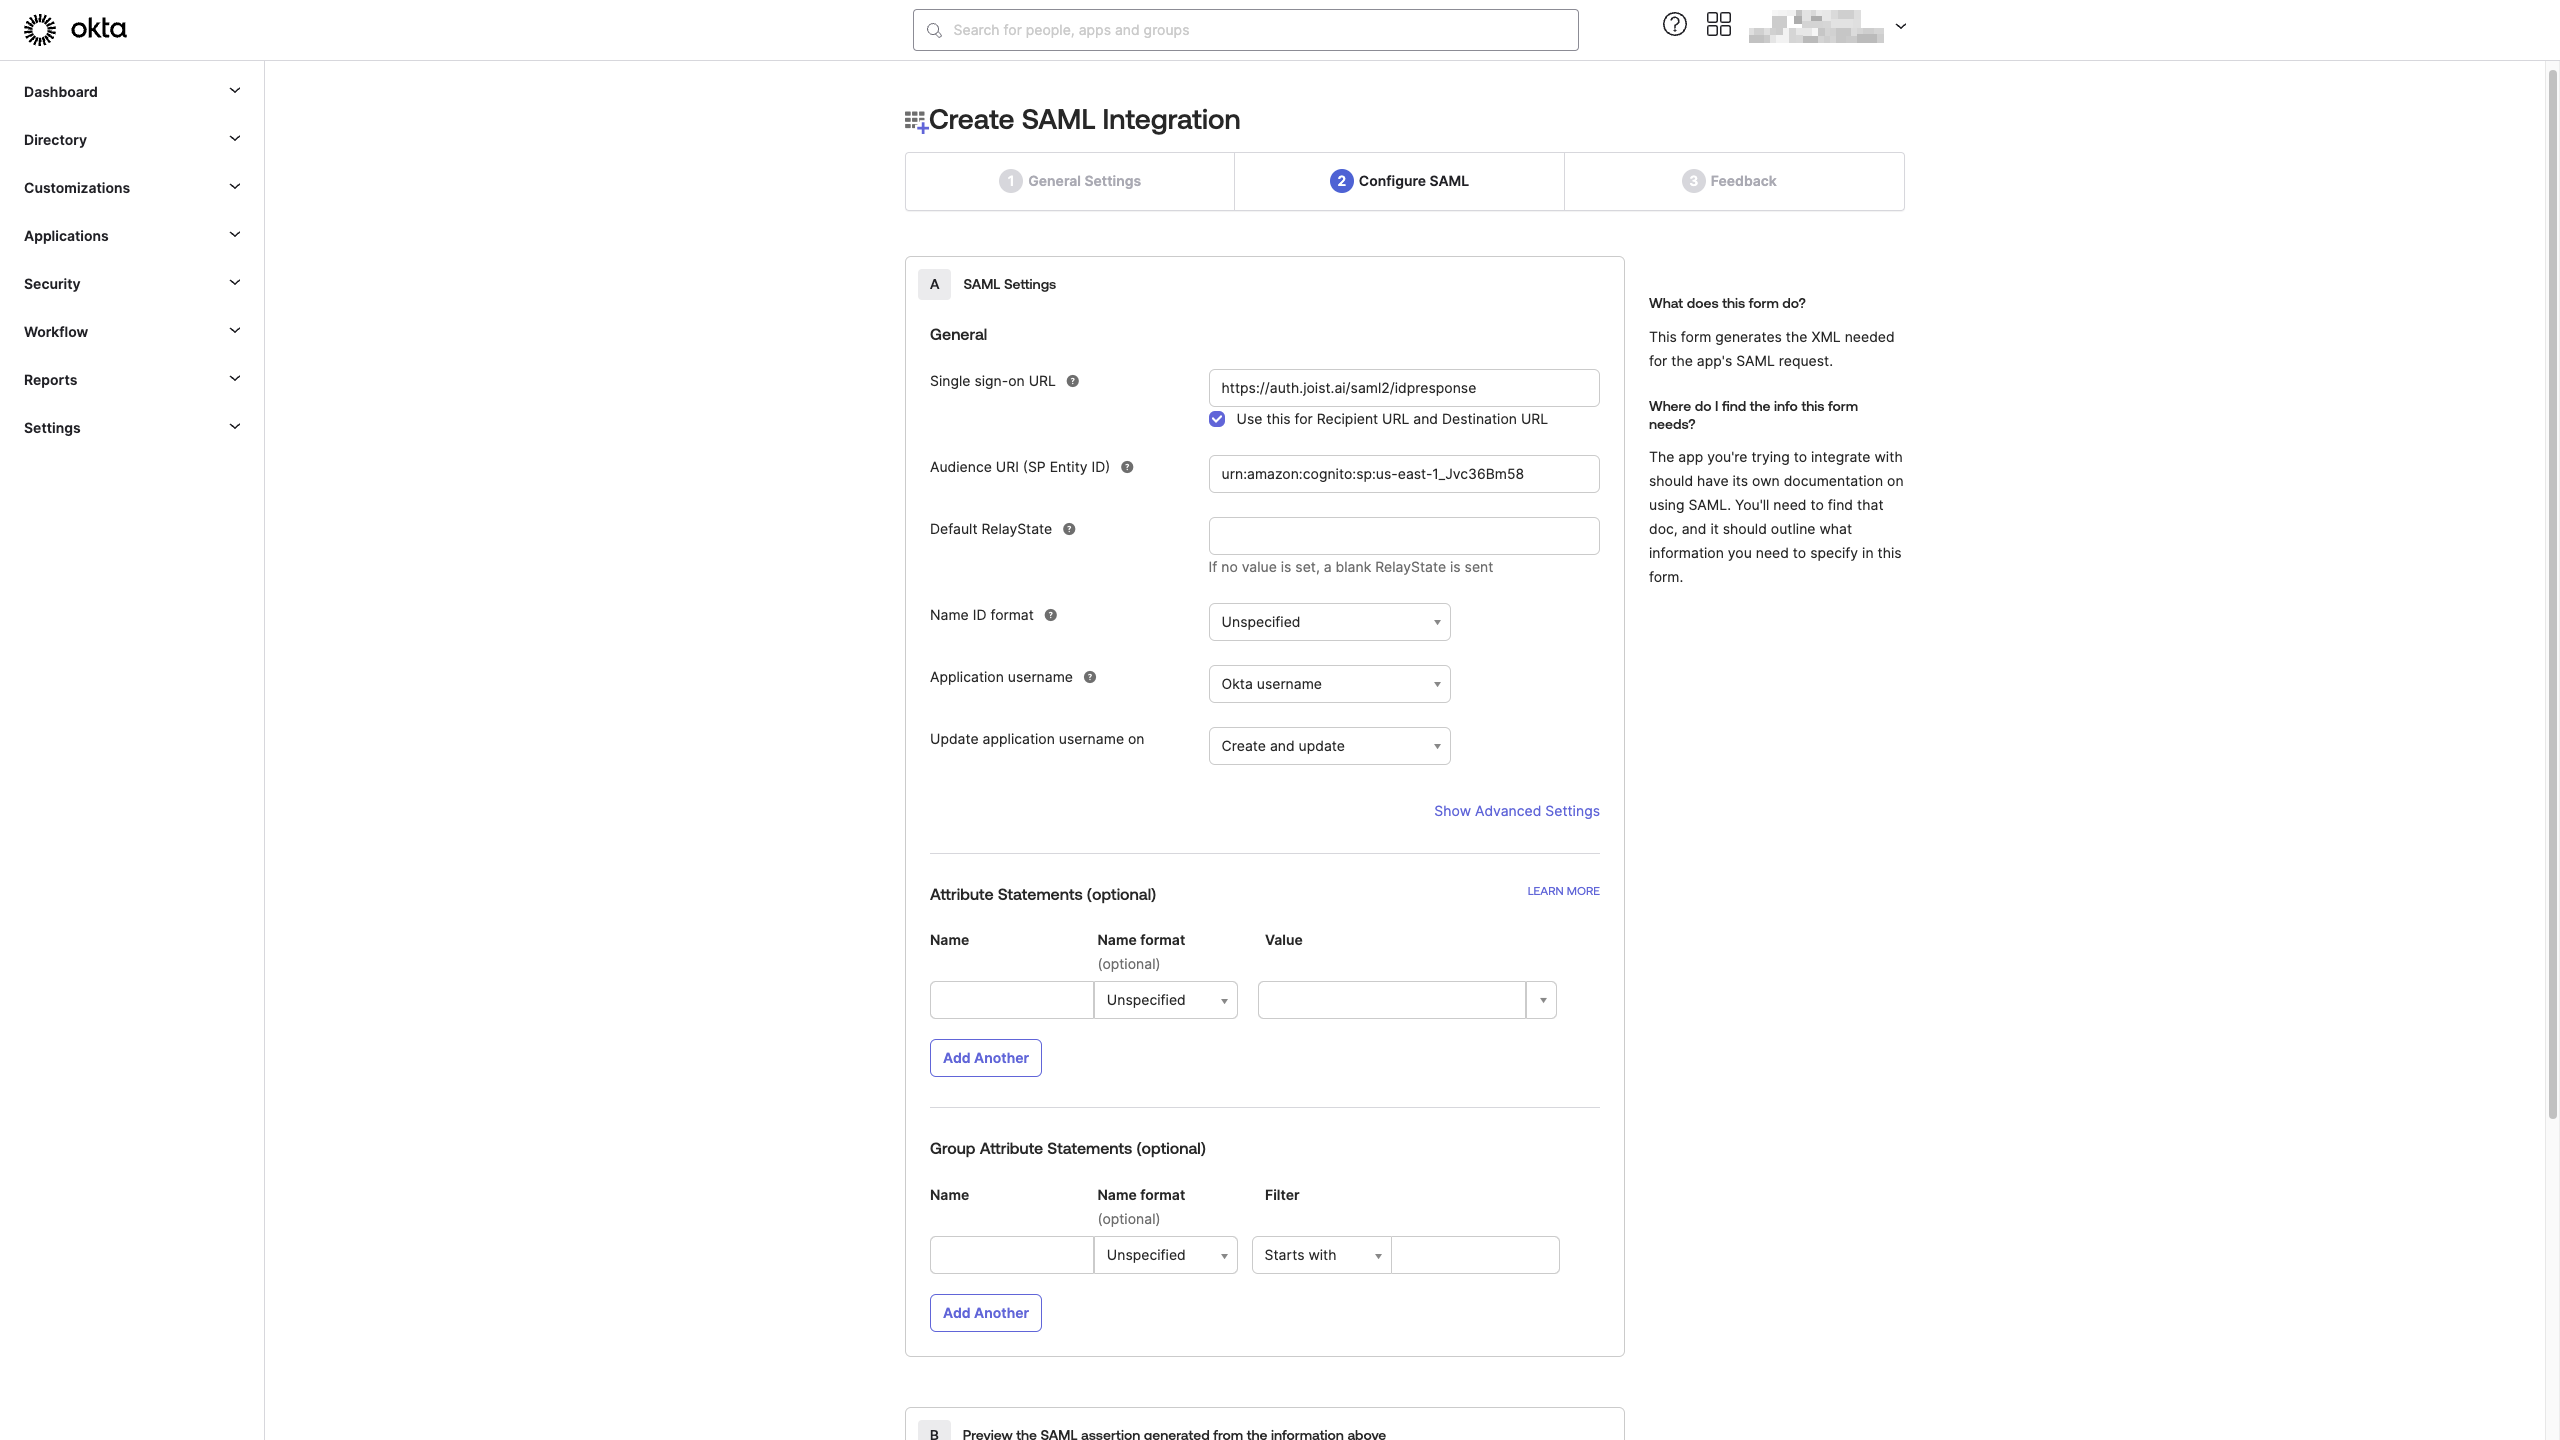
Attribute Statements:
Add a statement with the following information:
For "Name", enter:
emailaddress.For "Value", choose:
user.email.
Note: Ensure the
emailaddressattribute is mapped to the source attribute that contains the organization mail ID allocated to the user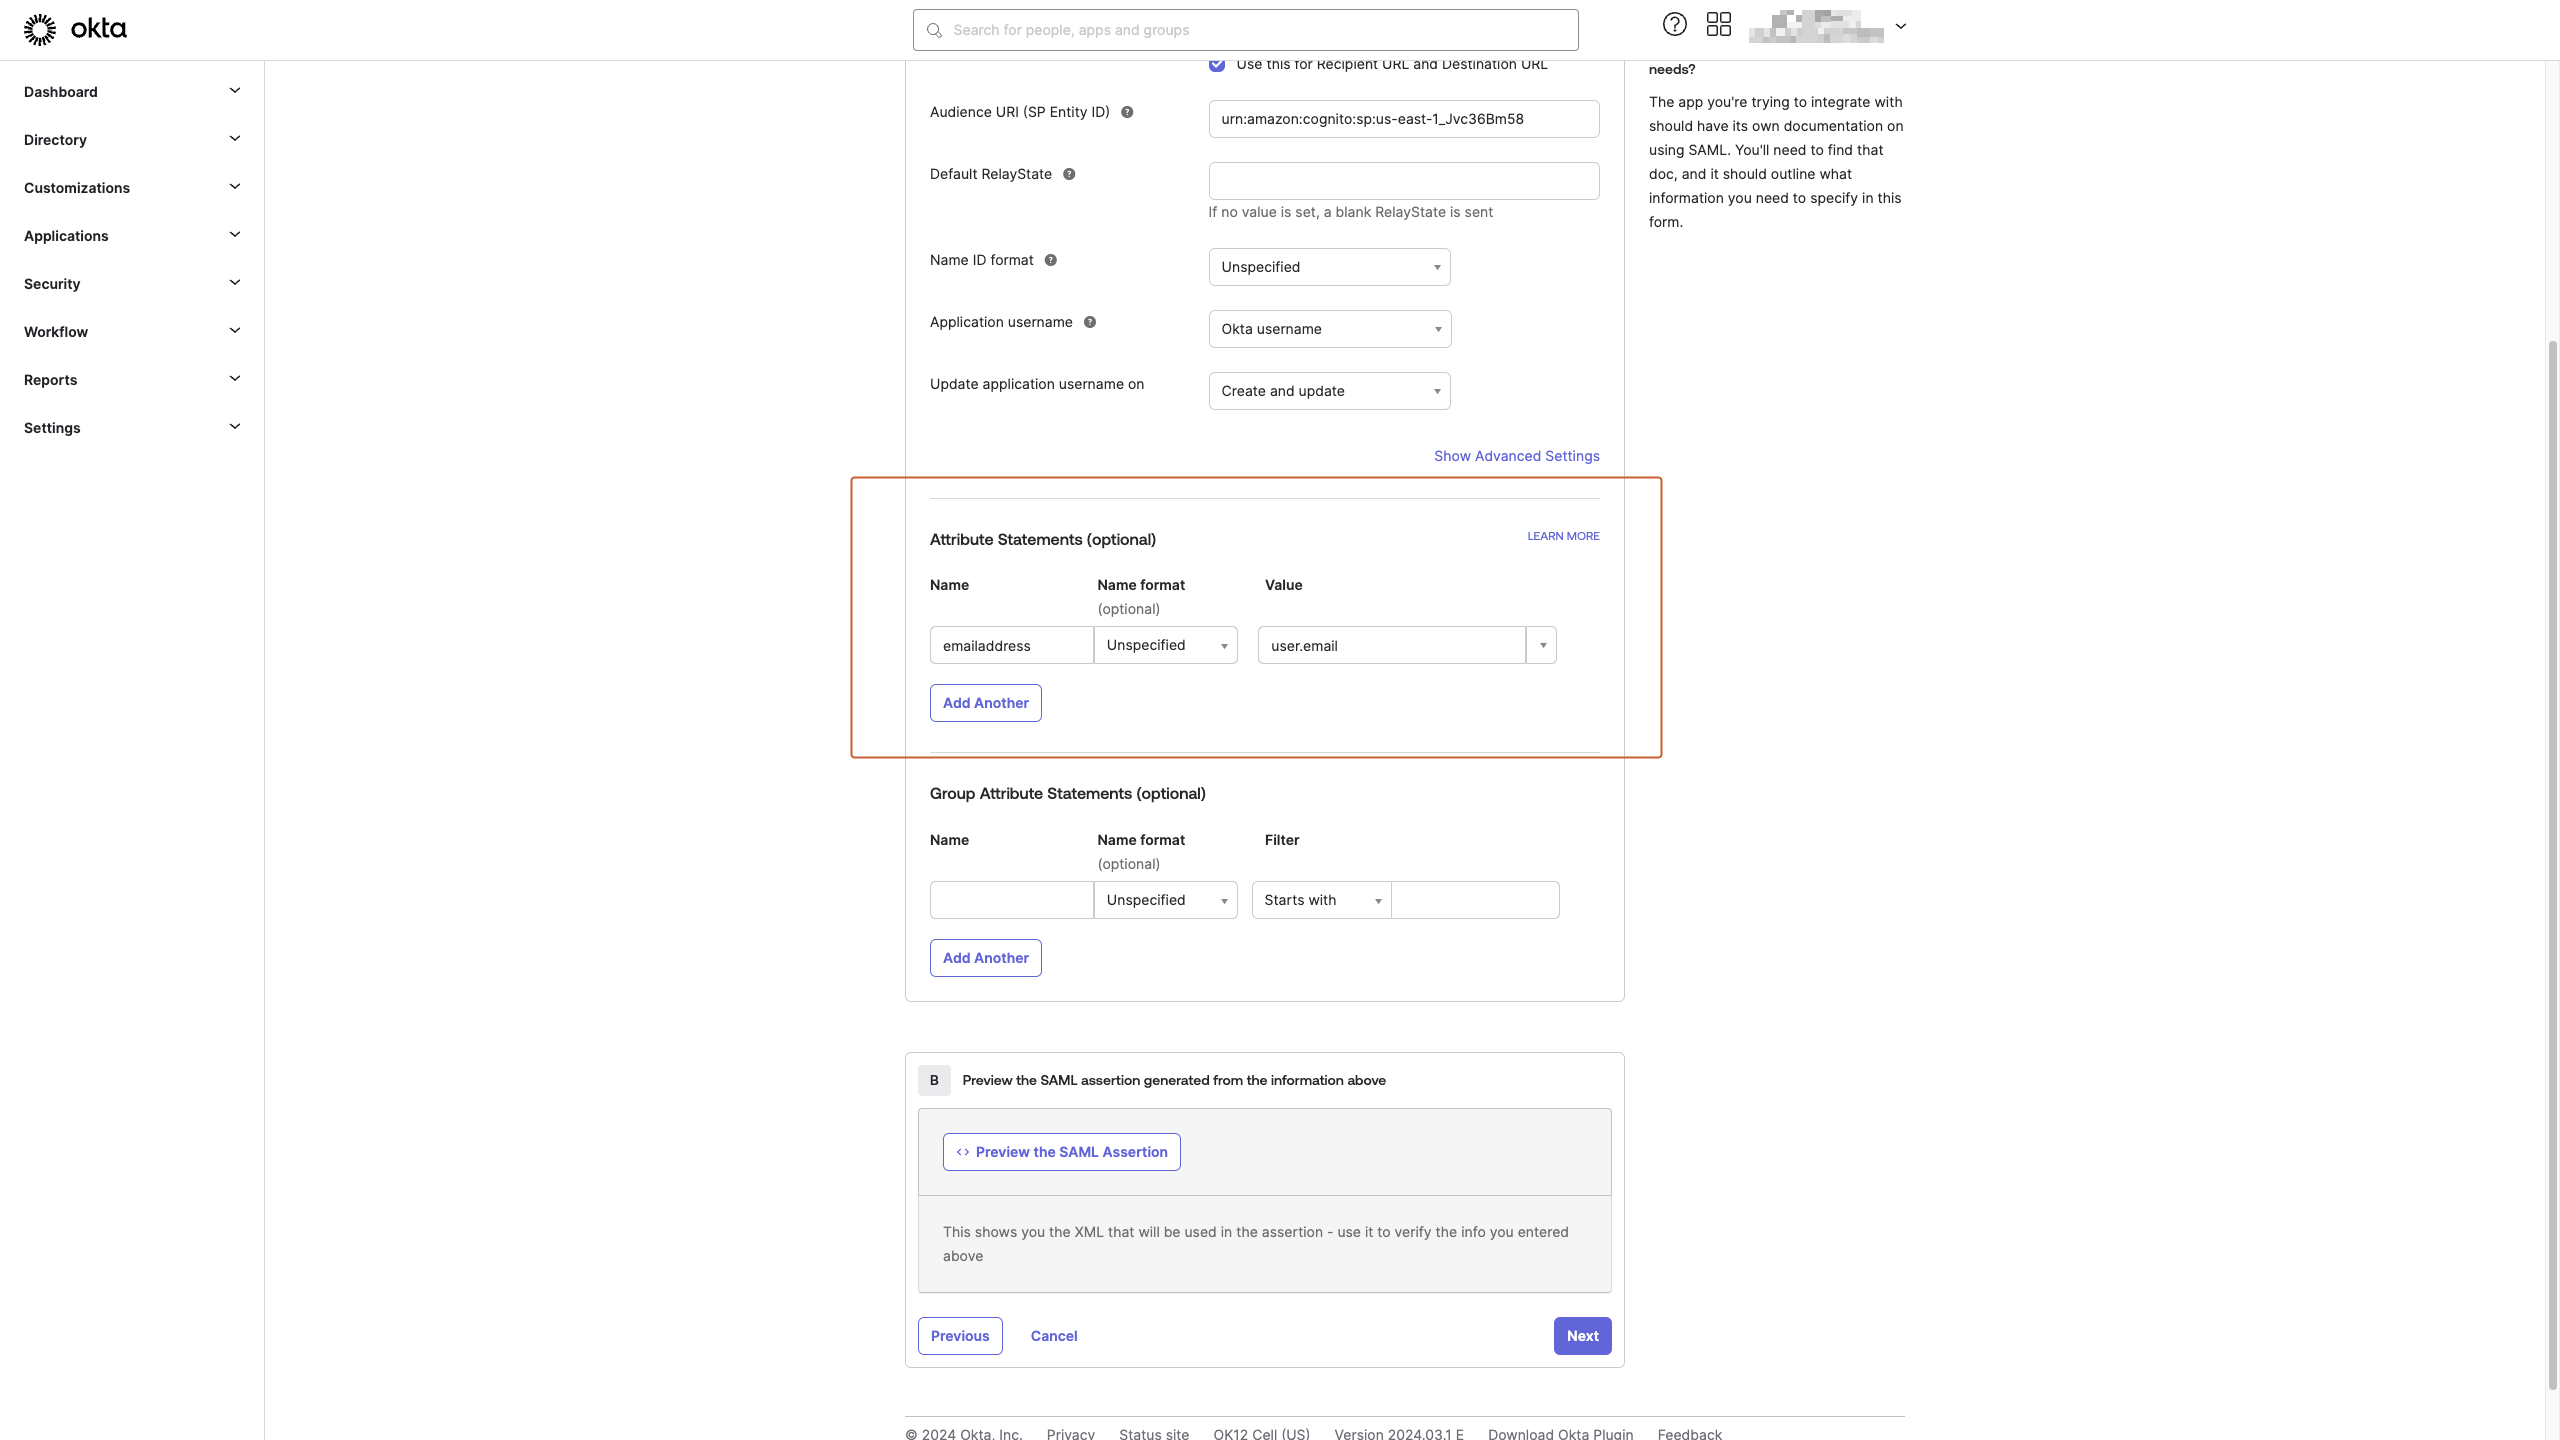
Review and Finish:
Review the configuration settings to ensure accuracy.
Choose any feedback response for Okta Support, if applicable.
Click "Finish" to complete the SAML integration setup process.
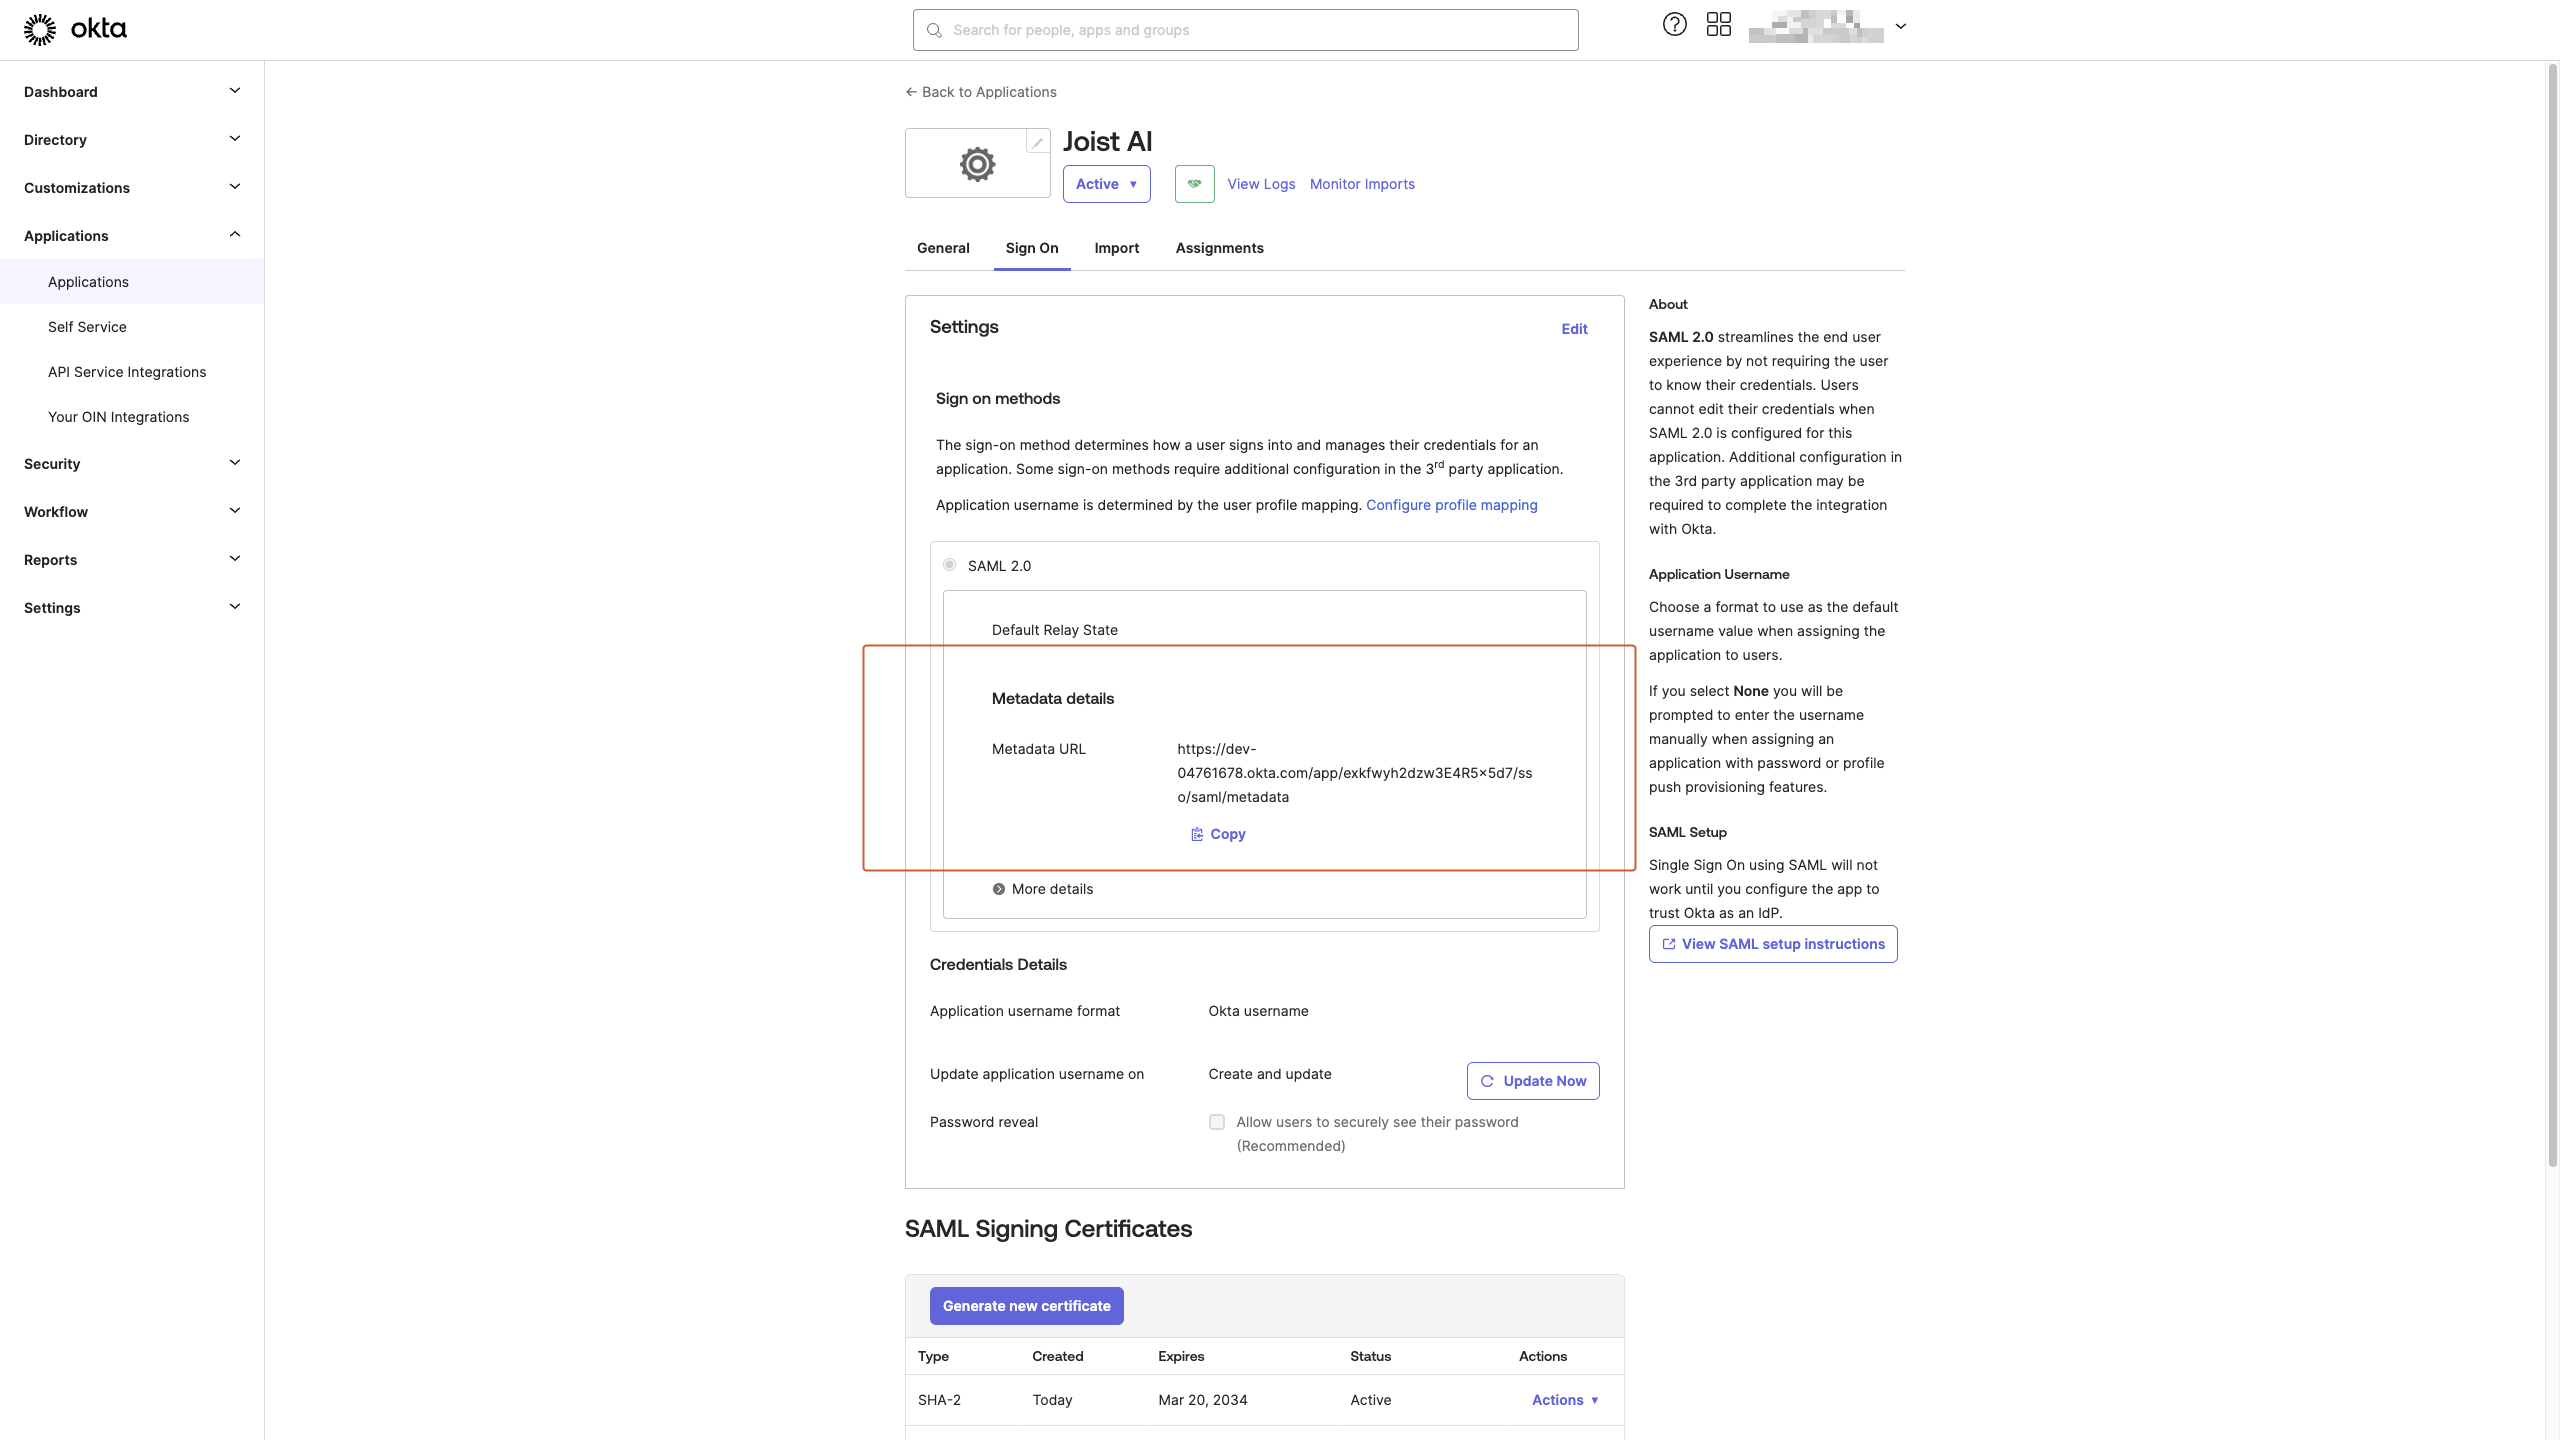
Please record the "Metadata URL" found under the "Sign On" section and provide us with the URL along with your organization's subdomain.
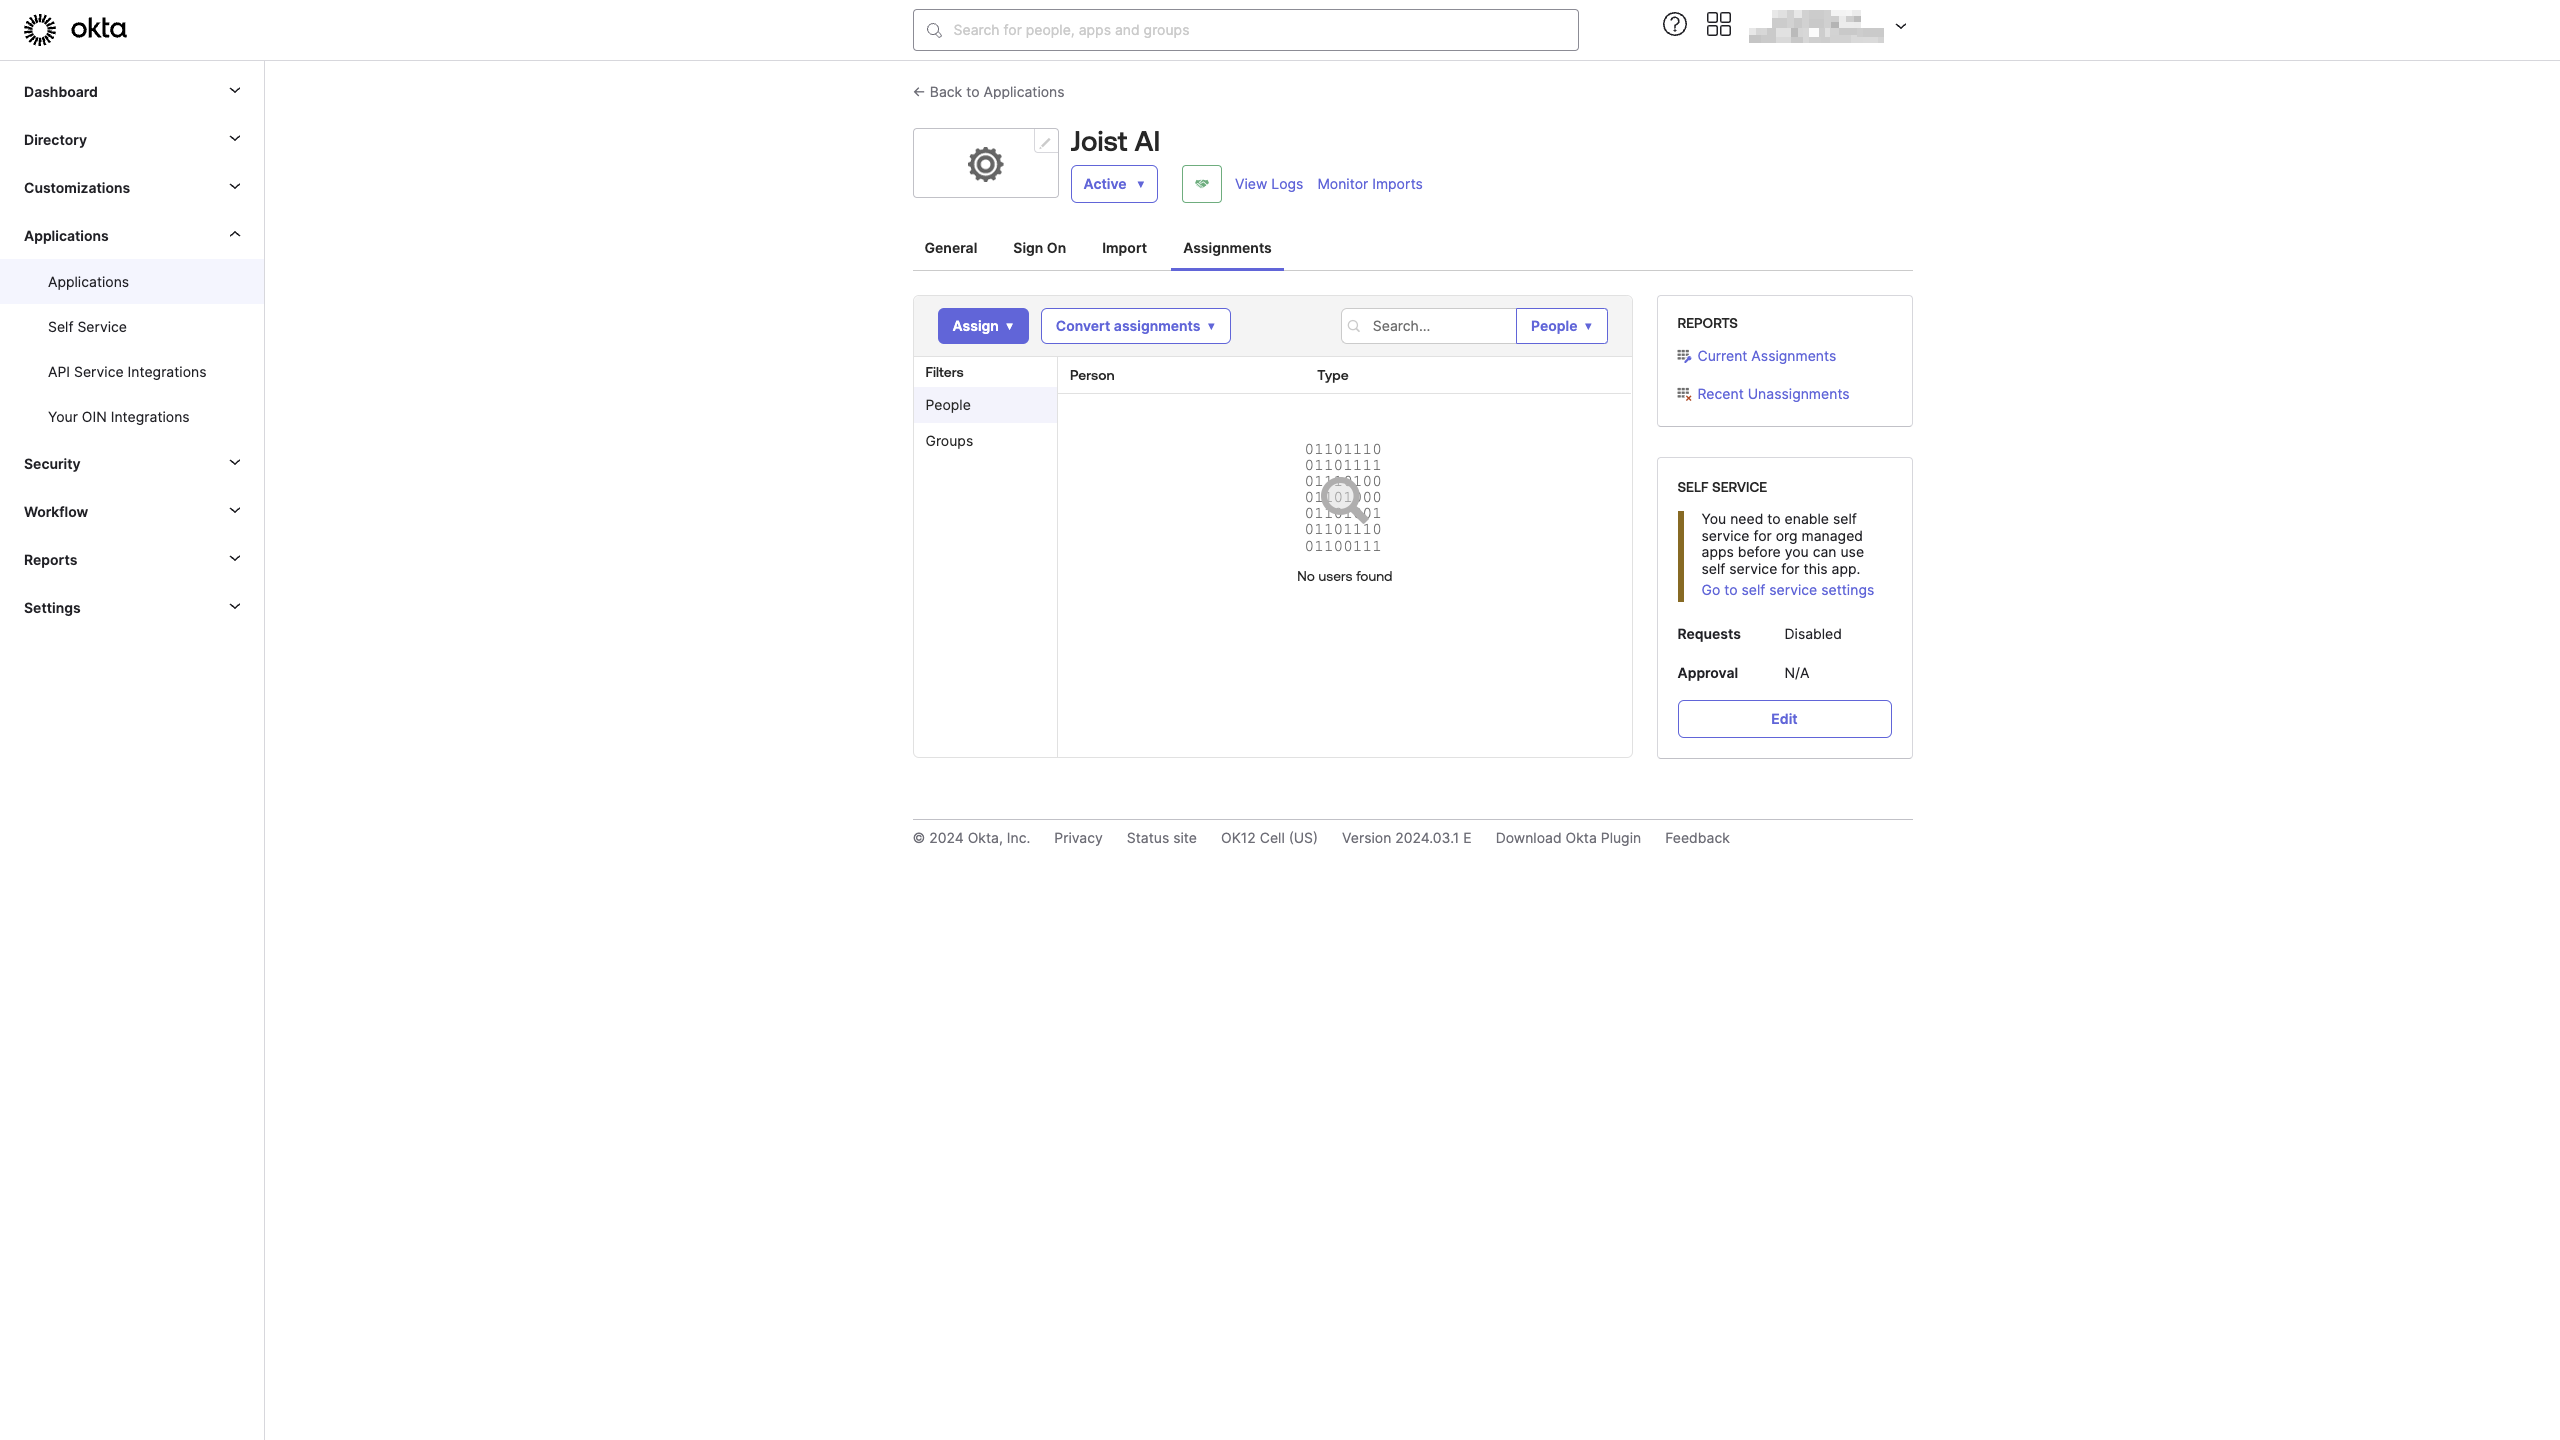
To add users to the application, go to the “Assignments” tab and select the users to provide access to the application
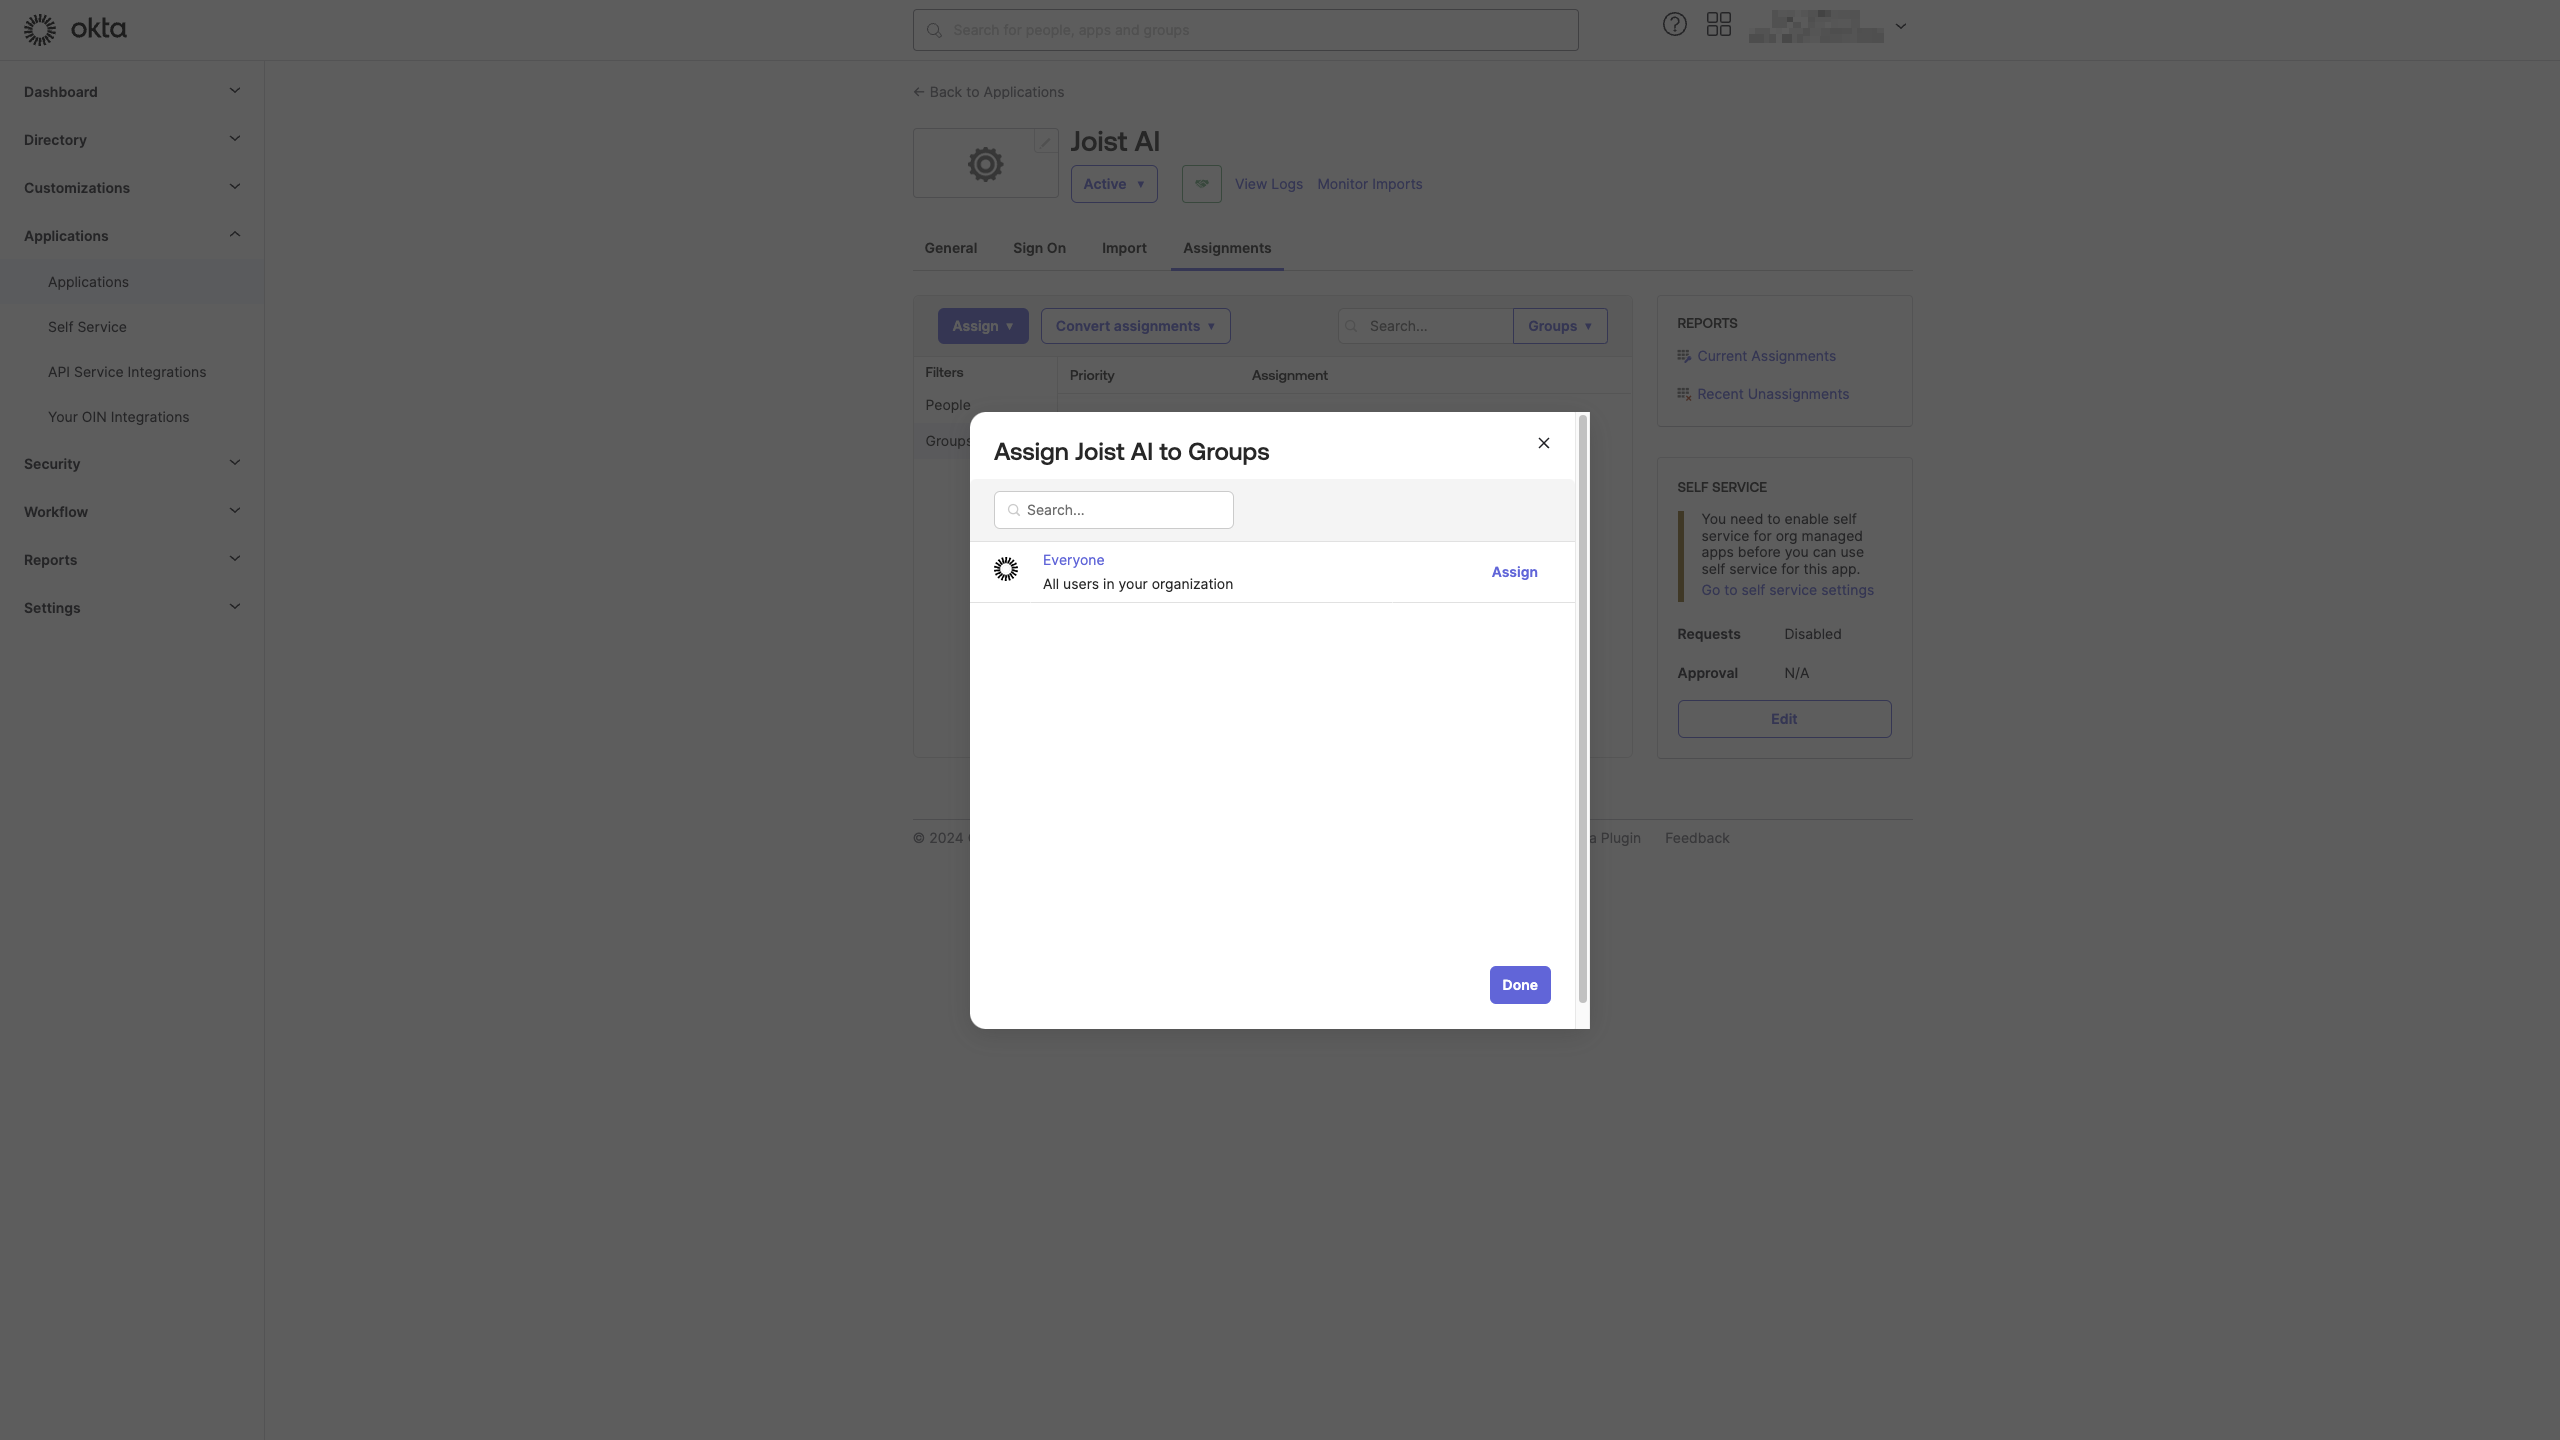
Click on the “Assign” button to display a popup that can be used for assigning the app. Assignment can also be done to “Groups” instead of individual users
You can always find more information on Security and Integrations on our Support Center. Please send any questions or feedback to Support@Kantiv.com.