Adding Files to a Workspace
Last updated: July 15, 2026
As of July 2026, Kantiv has released a new version of Workspaces and Document Analysis. This article covers the new version of Workspaces and articles covering the Legacy version can be found in this collection.
Each workspace has two types of file sections: the RFP/RFQ section for your RFX and addendum documents, and the Context section for supporting reference files. You can add files to either section at any time after creating your workspace.
Adding an RFX or Addendum
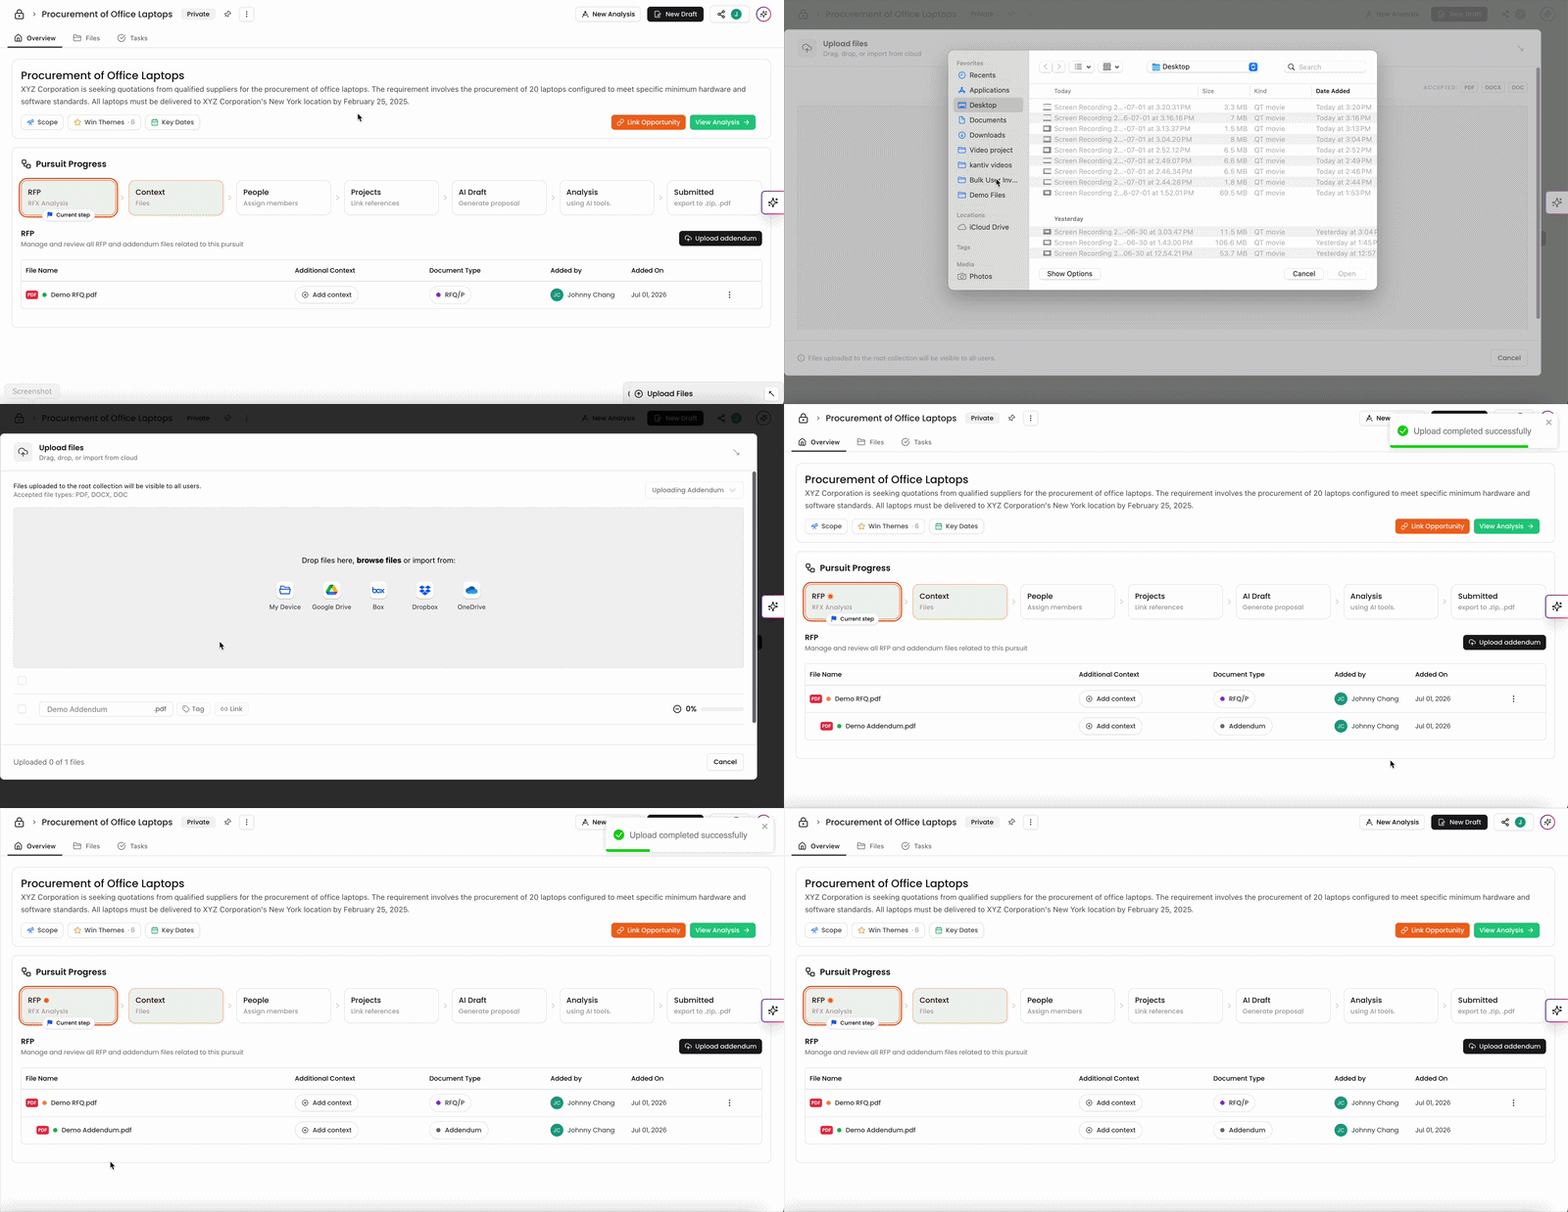
The RFP/RFQ section on your workspace Overview manages all RFX-related documents for the pursuit.
Open your workspace and go to the Overview tab.
In the RFP/RFQ section, click Upload addendum to add an addendum or supplemental RFX document.
Upload your file using one of the options: drag and drop, browse files, or import from My Device, Google Drive, Box, Dropbox, or OneDrive.
Once uploaded, the file appears in the RFP table with columns for File Name, Additional Context, Document Type, Added by, and Added On.
To add context notes to a file, click Add context in the Additional Context column next to the file. You can also update the Document Type by clicking the type badge and selecting from the dropdown.
Adding Supporting Files (Context)
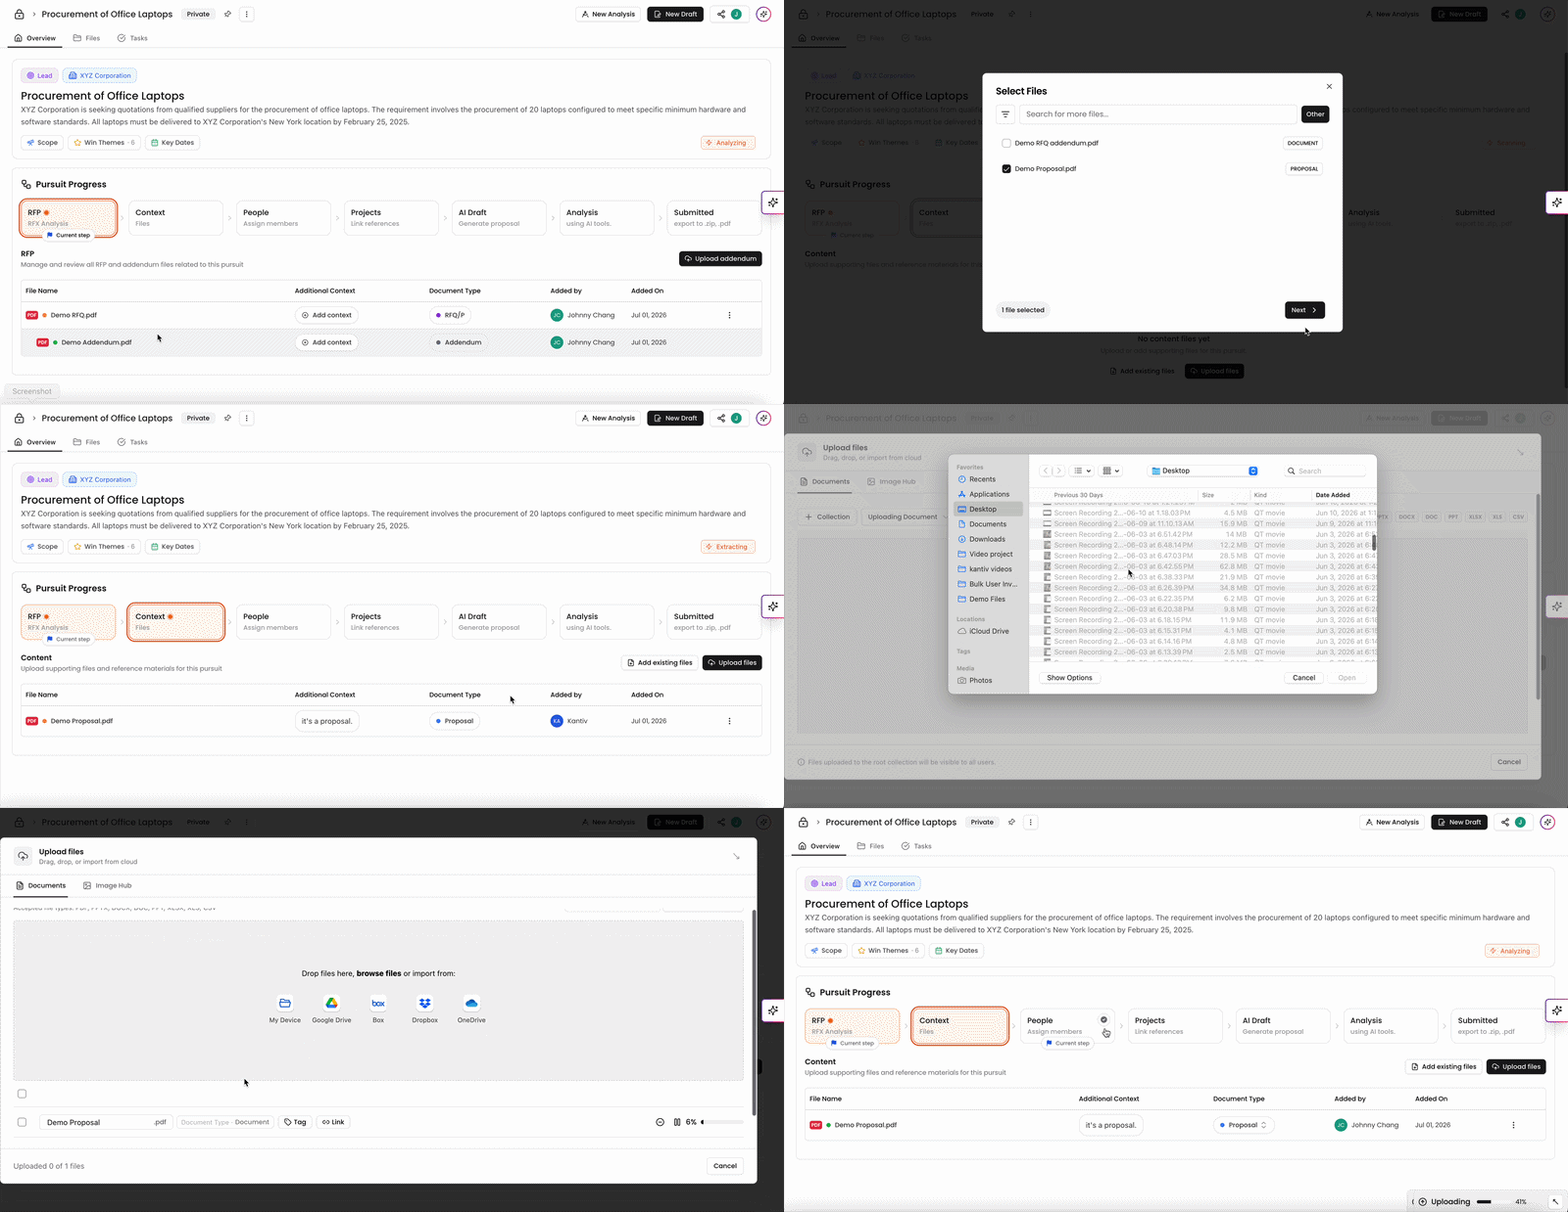
The Context section on your workspace Overview is for reference materials such as past proposals, qualification documents, and other supporting files.
To add files from your Kantiv library:
In the Context section, click Add existing files.
In the Select Files dialog, browse or search your library. Use the Other tab to filter by file type.
Check the files you want to add. A counter at the bottom shows how many are selected.
Click Next, then confirm your selection.
To upload new files from outside Kantiv:
In the Context section, click Upload files.
Upload your file by dragging and dropping it into the upload area, or by selecting your preferred import source: My Device, Google Drive, Box, Dropbox, or OneDrive.
Uploaded files appear in the Context table with their Document Type automatically detected. You can update the type by clicking the badge and selecting from the dropdown.
The Files Tab
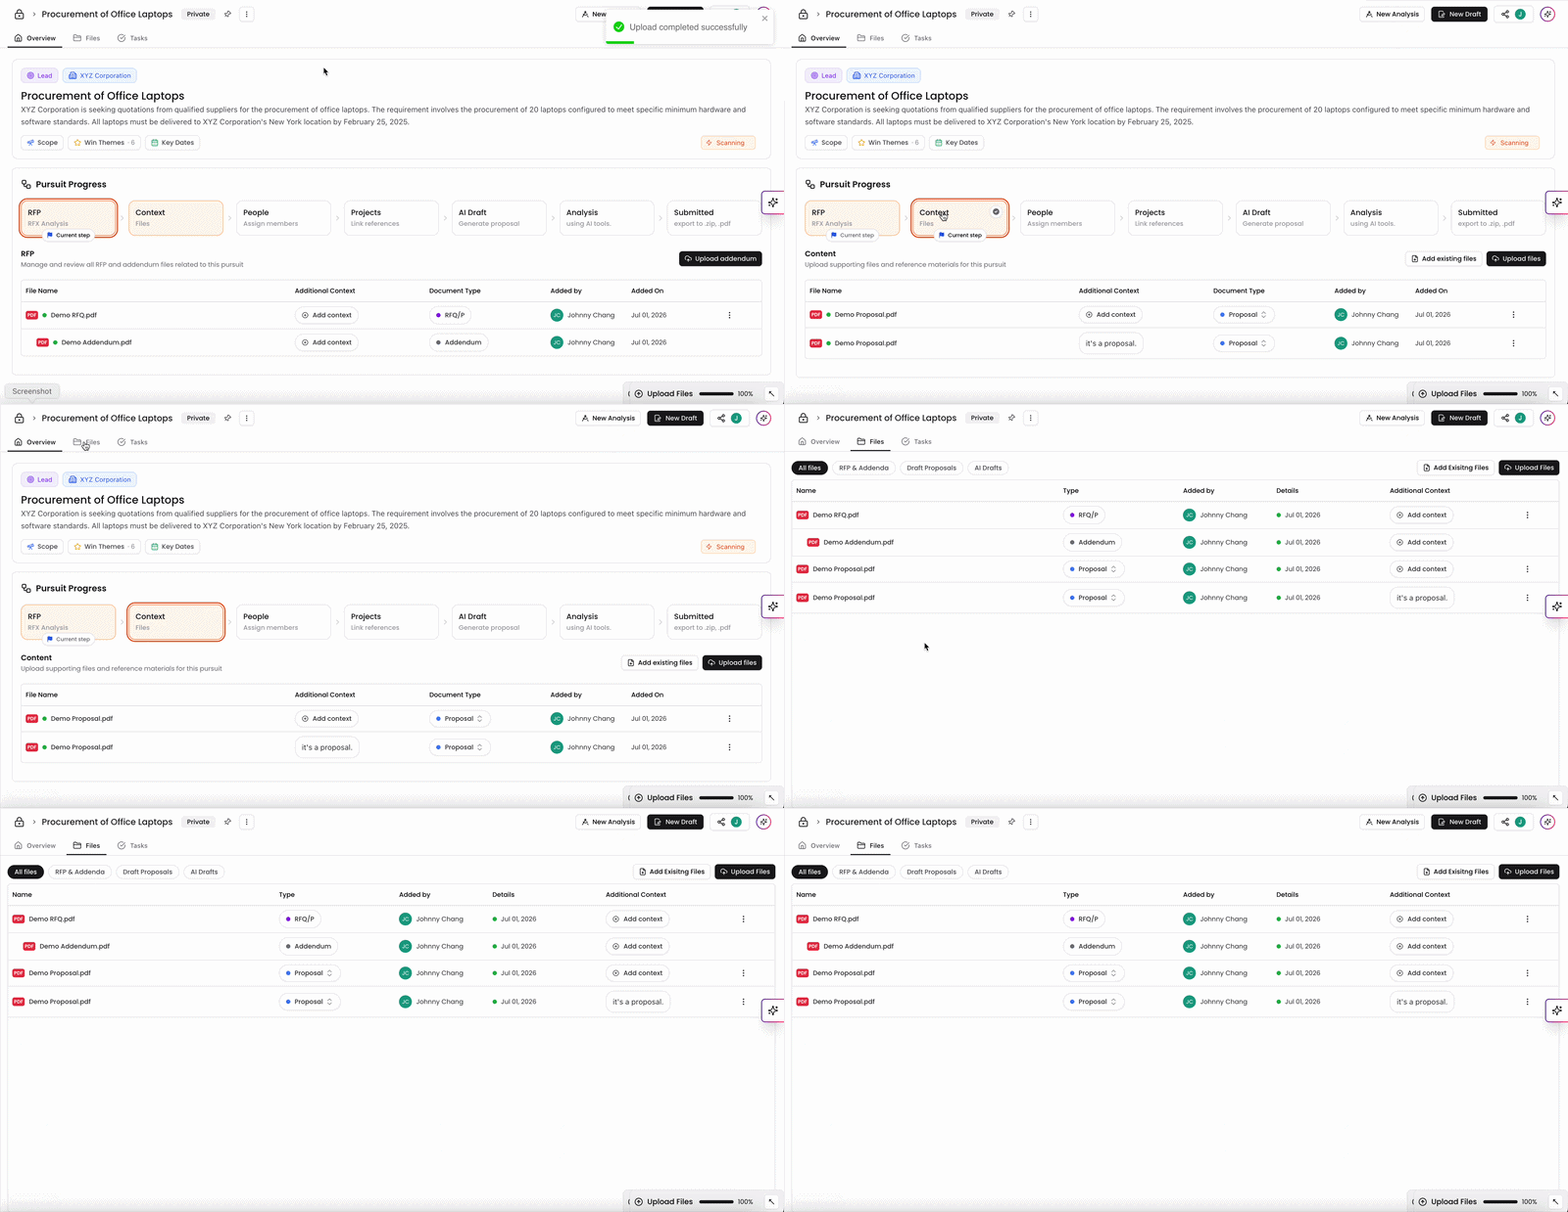
In addition to the Overview, each workspace has a dedicated Files tab at the top of the workspace. Click Files to see all documents associated with the workspace in a single view, including RFx, context, analysis files and AI drafts.
Removing a File
To remove a file from a workspace, click the ⋮ menu to the right of the file row and select Delete.
You can always find more information on Workspaces in our Support Center. Please send any questions or feedback to Support@Kantiv.com.