Storyboards, Search, and Files in Workspaces
Last updated: July 15, 2026
As of July 2026, Kantiv has released a new version of Workspaces and Document Analysis. This article covers the new version of Workspaces and articles covering the Legacy version can be found in this collection.
Once your Smart Draft is generated, you'll work in the draft editor to review, generate, and refine your proposal content. The editor is organized around the Storyboard — a structured outline of every section in your draft — and a live document view where content streams in as the AI writes it.
The Draft Editor
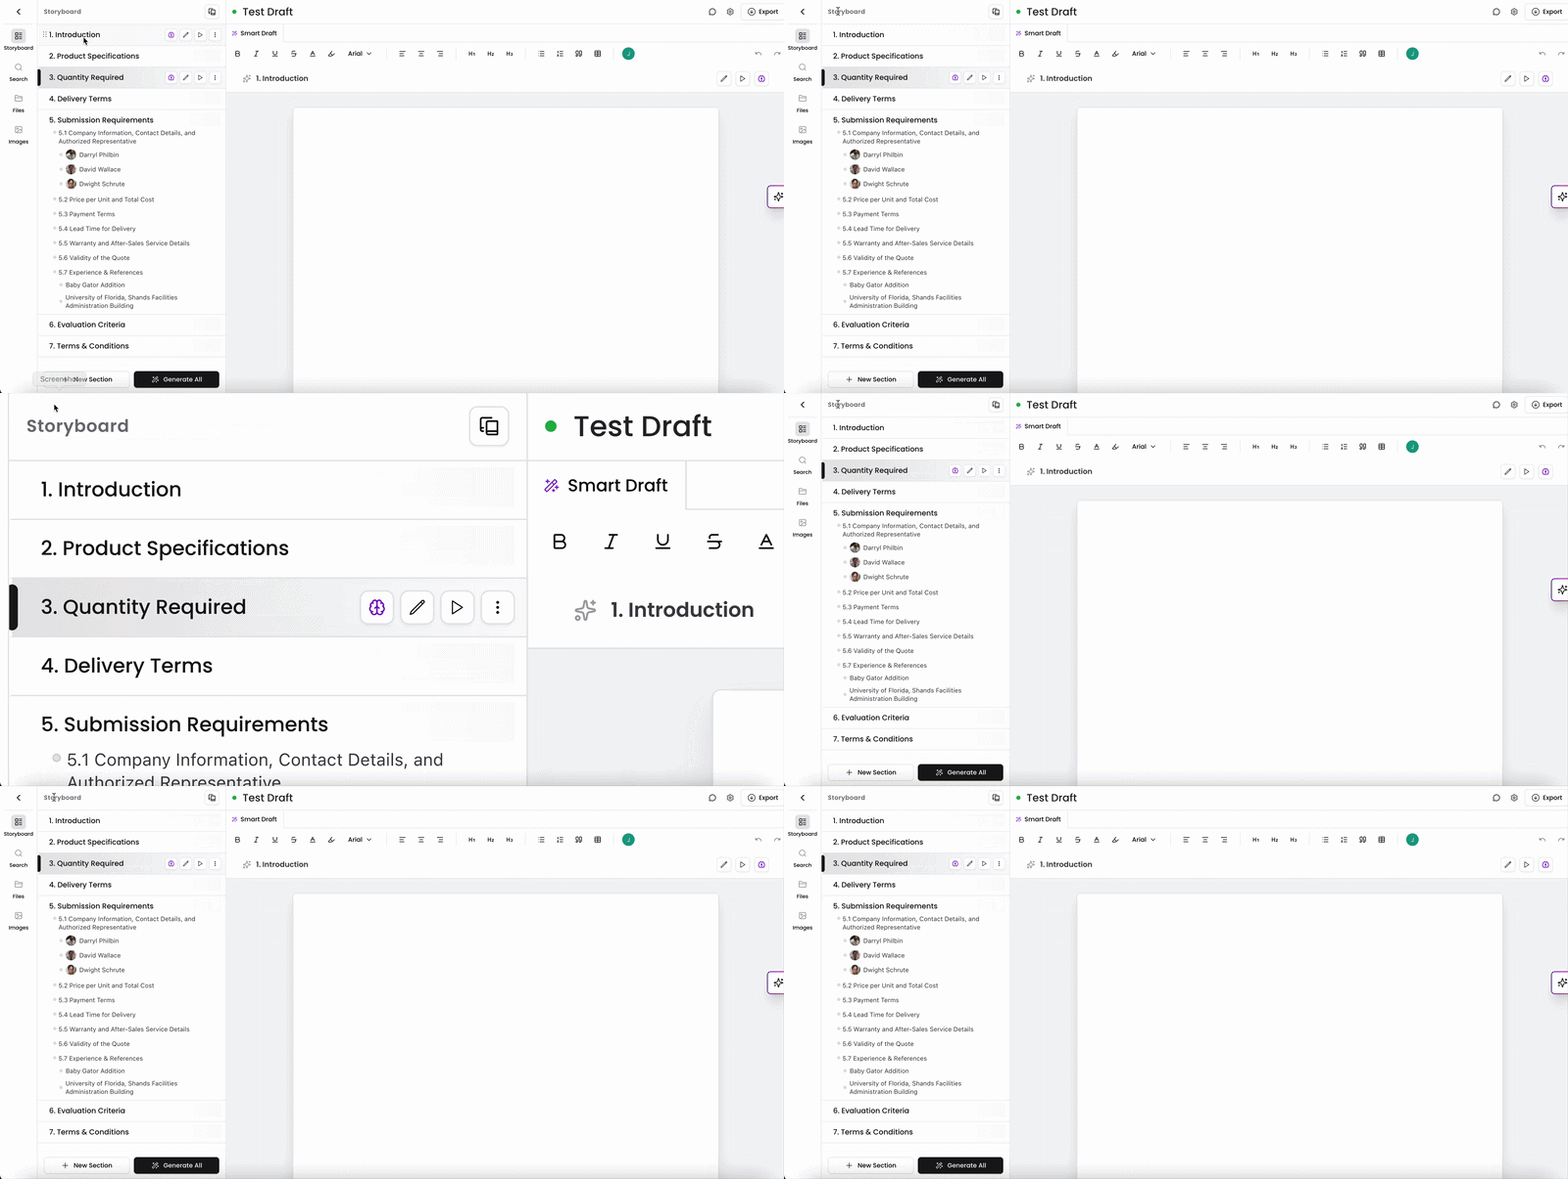
The draft editor has two panels:
Storyboard (left) — lists every section of your draft in order. Sections generated from your RFX appear as numbered items. Your linked team members appear under Appendix A – Key Personnel Resumes and linked projects appear under Appendix B – Reference Projects. At the bottom, + New Section and Generate All let you add sections or generate content for all sections at once.
Document editor (right) — shows the formatted content of the currently selected section. Use the toolbar at the top to format text (bold, italic, headings, lists, tables, etc.).
The draft name and a Smart Draft badge appear at the top. The Export button in the top right lets you export the finished draft.
Generating Content
You can generate content for sections one at a time, or all at once.
Generate a Single Section
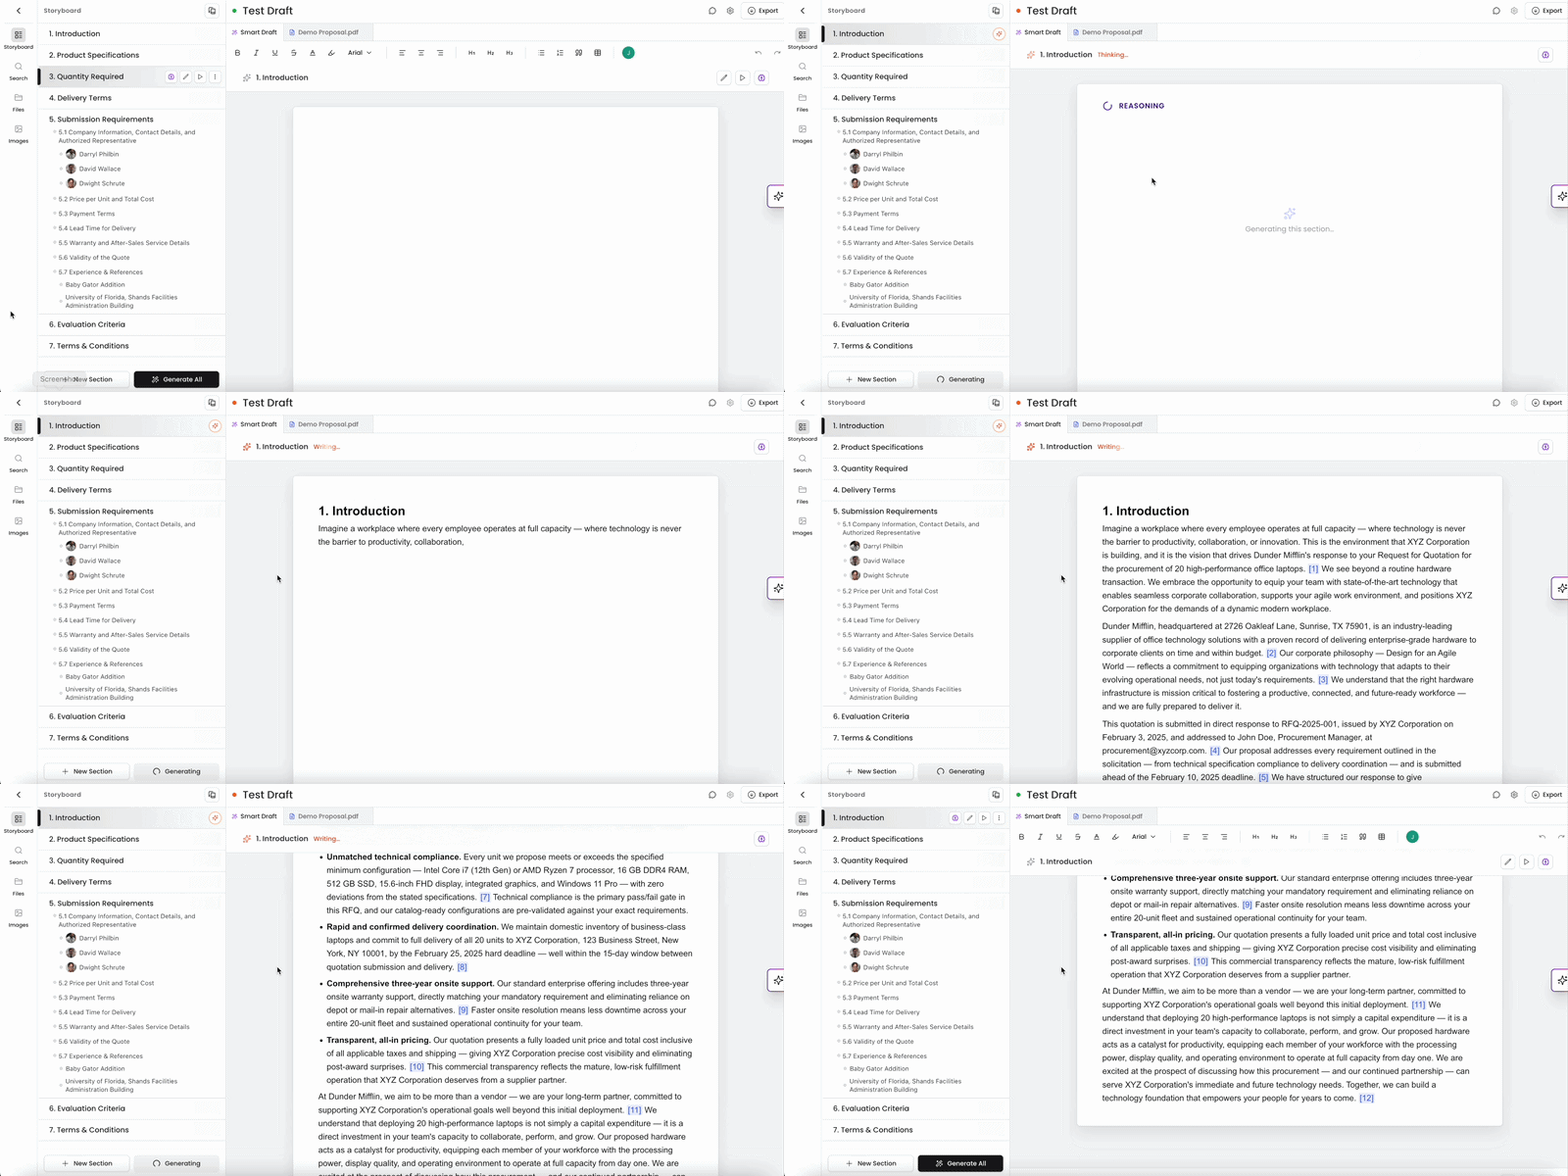
Hover over a section in the Storyboard to reveal four inline icons.
Click the ▷ (play) icon to generate content for that section.
The section header shows Thinking... then Writing... as the AI reasons through the content and begins writing. A REASONING block appears in the editor first, followed by the generated content streaming in.
Generate All Sections at Once
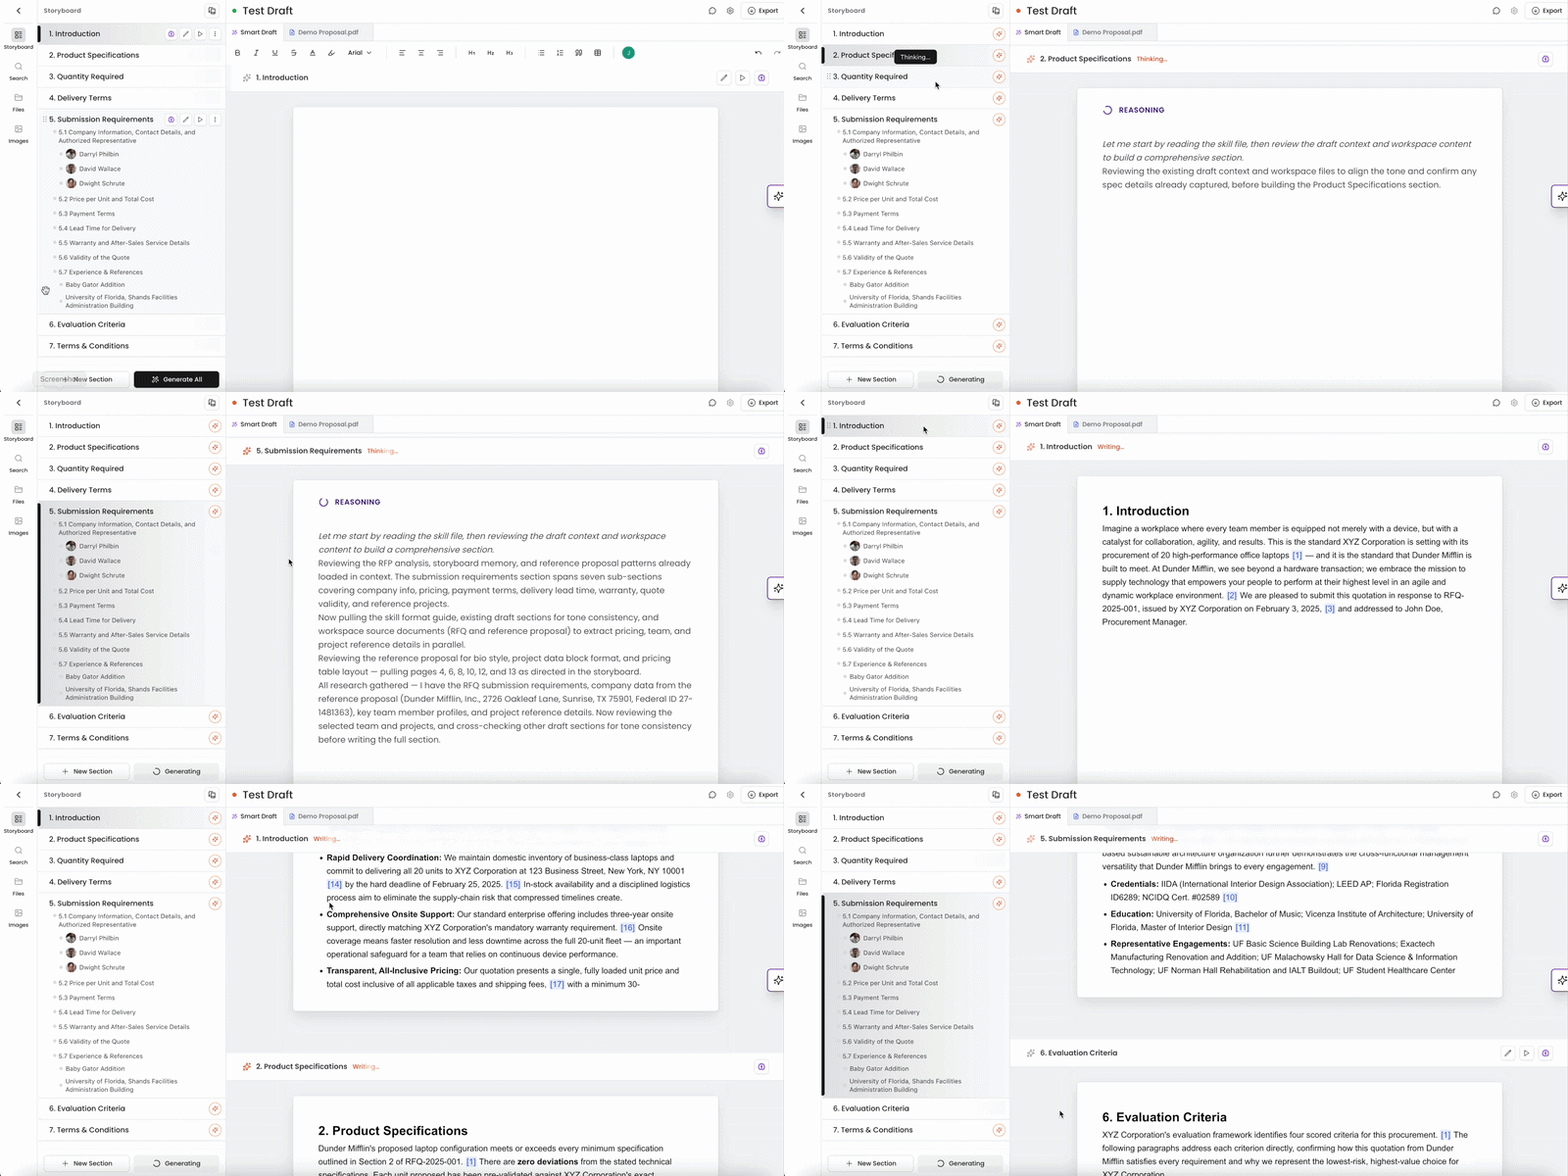
Click Generate All at the bottom of the Storyboard panel.
All sections show a spinning AI icon simultaneously.
Kantiv generates each section in parallel — watch the content stream into the editor as each section completes.
Generated content includes inline citation numbers (e.g., [1], [7]) that link back to the source documents the AI referenced.
Editing a Section's Prompt
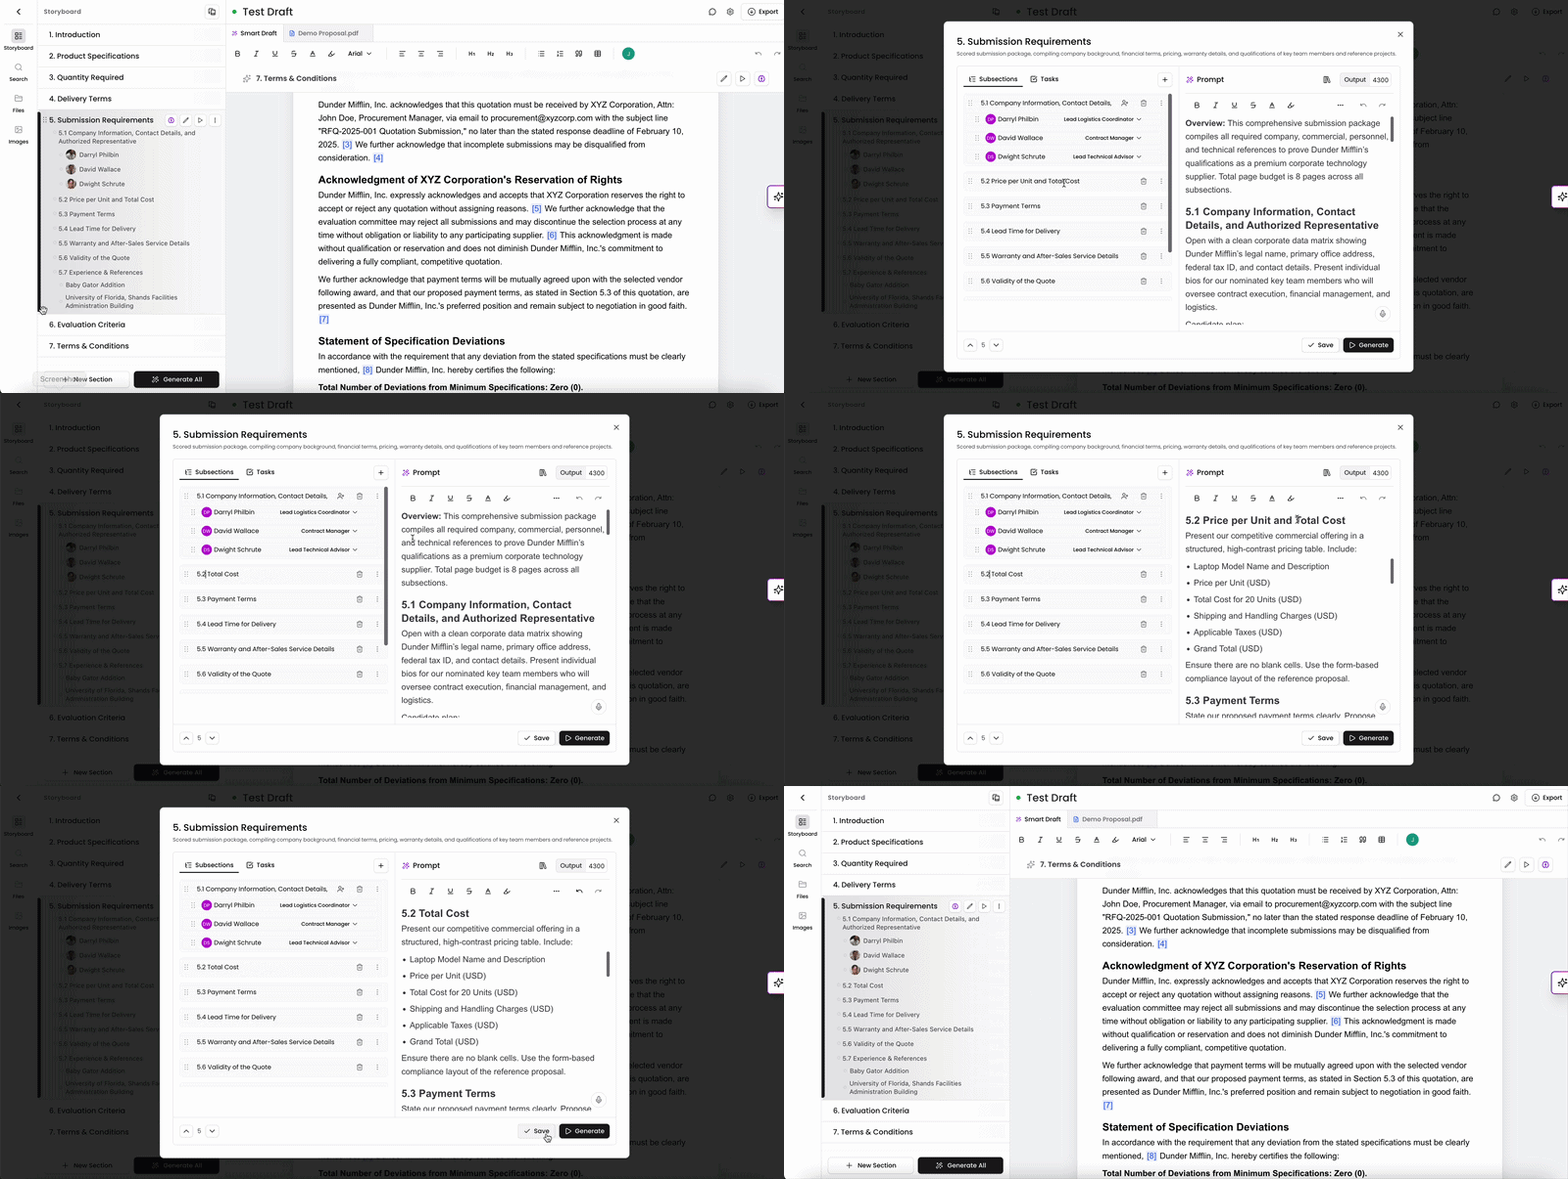
Each section has an AI-generated prompt that defines what it should contain and how it should be written. You can view and edit this prompt to customize the output before regenerating.
Hover over a section and click the Pencil Icon to open the section settings panel.
The panel shows:
The section name and description
A Subsections tab listing any nested subsections, with a + button to add a Subsection, People, or Project
A Tasks tab for any assigned tasks
A Prompt field containing the AI instructions for this section
An Output word count target
A reference table showing which source documents the AI should draw from and what to look for
Edit the Prompt or Output target as needed.
Click Save to save your changes, or Generate to save and immediately regenerate the section.
Use the up/down arrow controls at the bottom left of the panel to reorder sections.
Adding a New Section
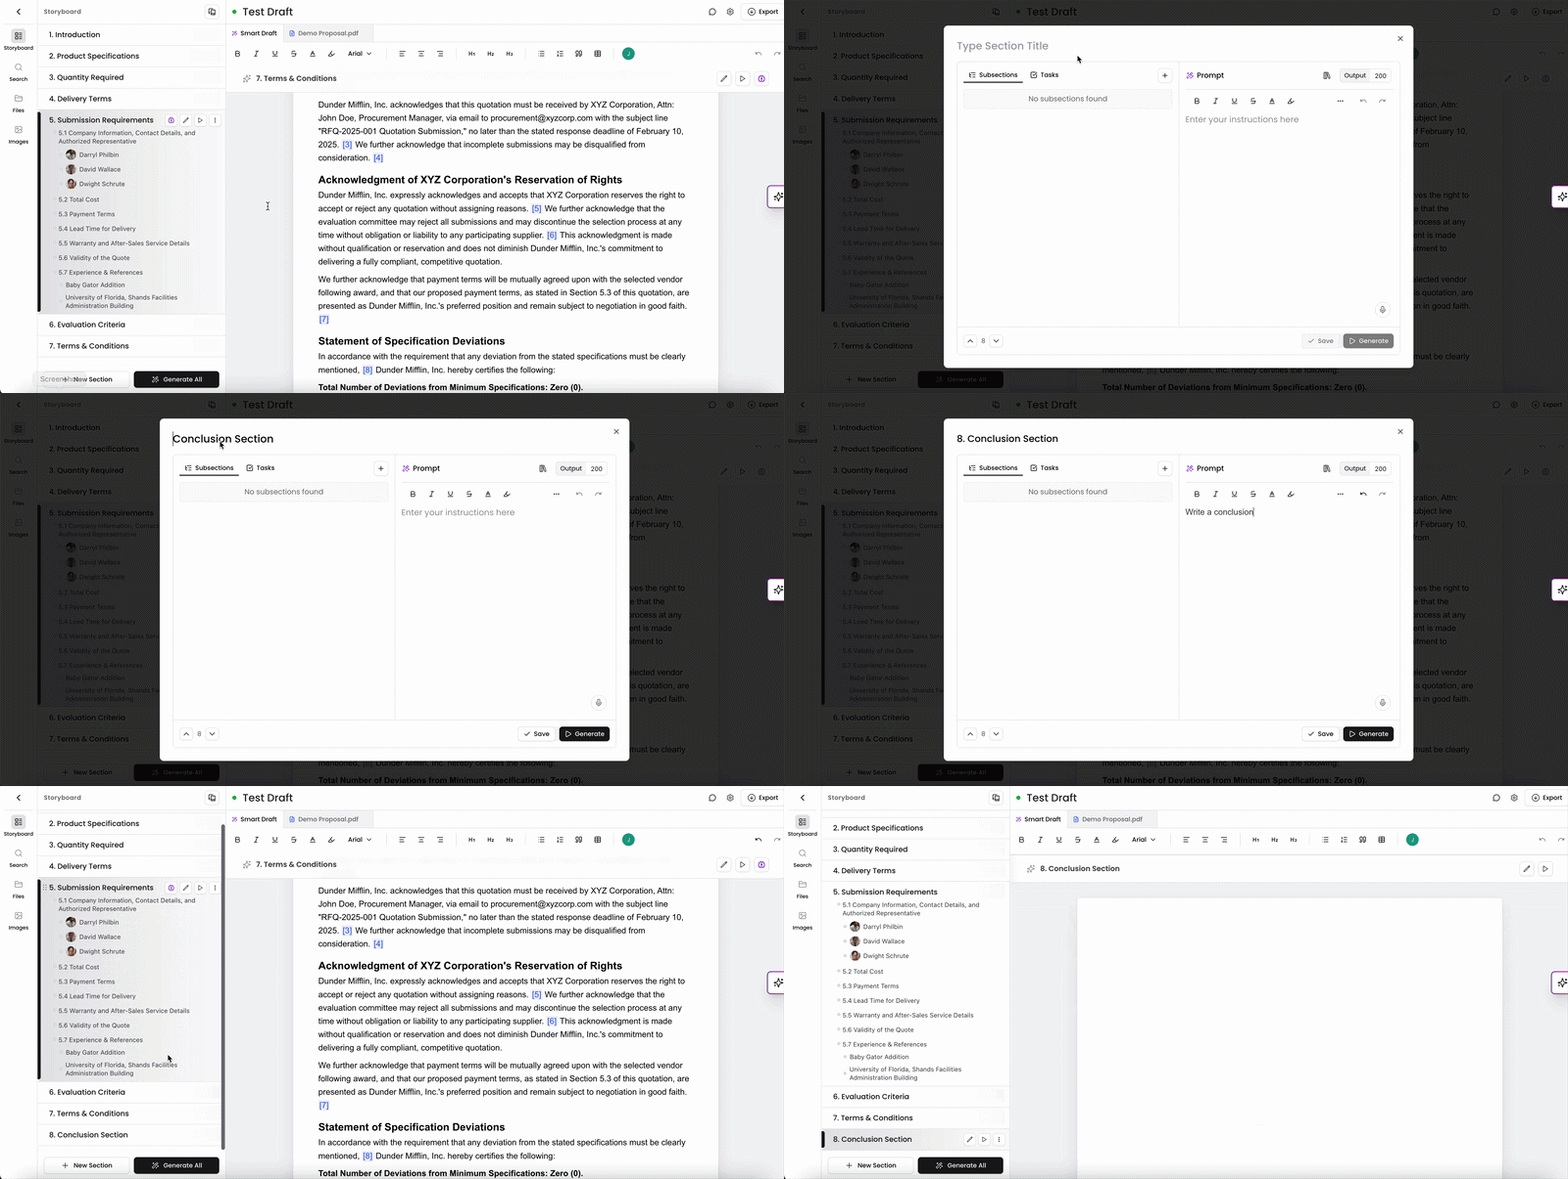
Click + New Section at the bottom of the Storyboard.
Enter a name for the section.
Click Save to add the section to your Storyboard, or Generate to add the section and generate content.
The new section appears in the Storyboard and you can open its settings to write or edit its prompt before generating.
Searching Your Workspace
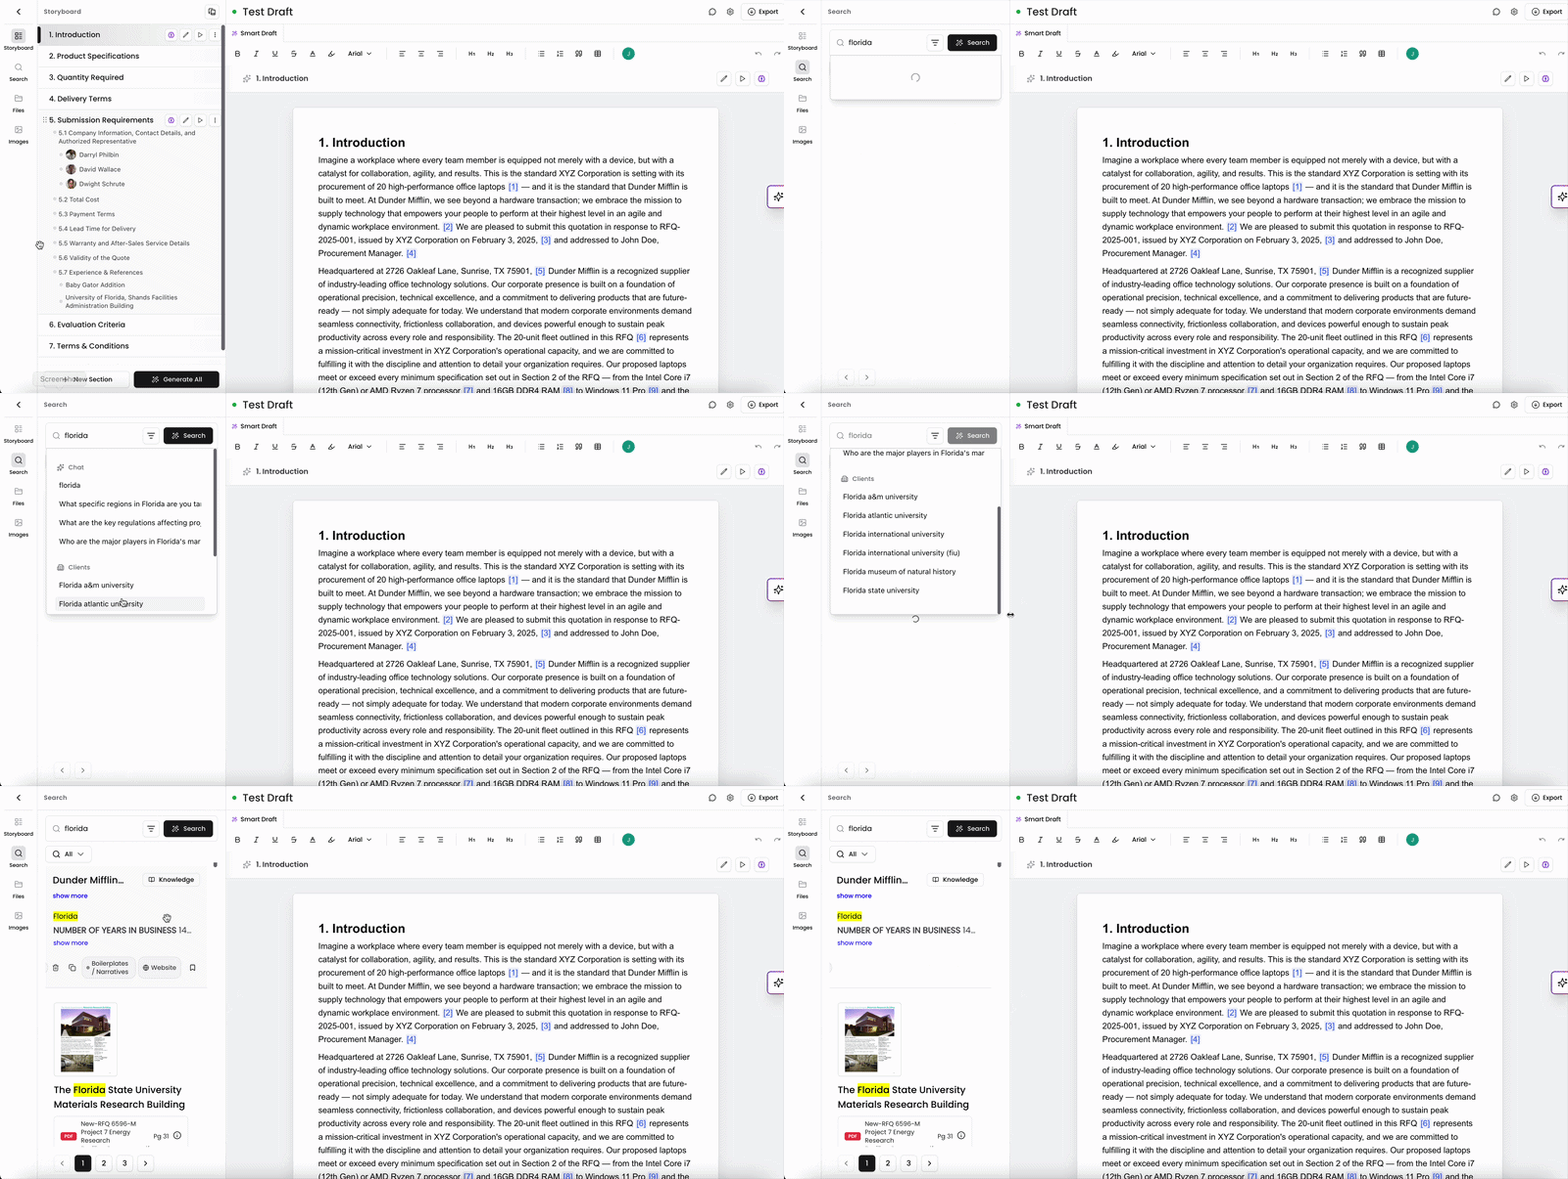
Click the Search icon in the left icon rail to open the Search panel.
Enter a keyword or phrase into the search field at the top of the panel.
As you type, a dropdown of live suggestions appears below the field, grouped by category — for example, Chat (matching questions from past chat sessions) and Clients (matching client records).
Click a suggestion to jump to it directly, or click Search to run a full search and list every match in the panel below.
Use the All dropdown beneath the search field to narrow results to a specific content type. Use the arrow buttons at the bottom of the panel to page through longer result lists.
Viewing Workspace Files
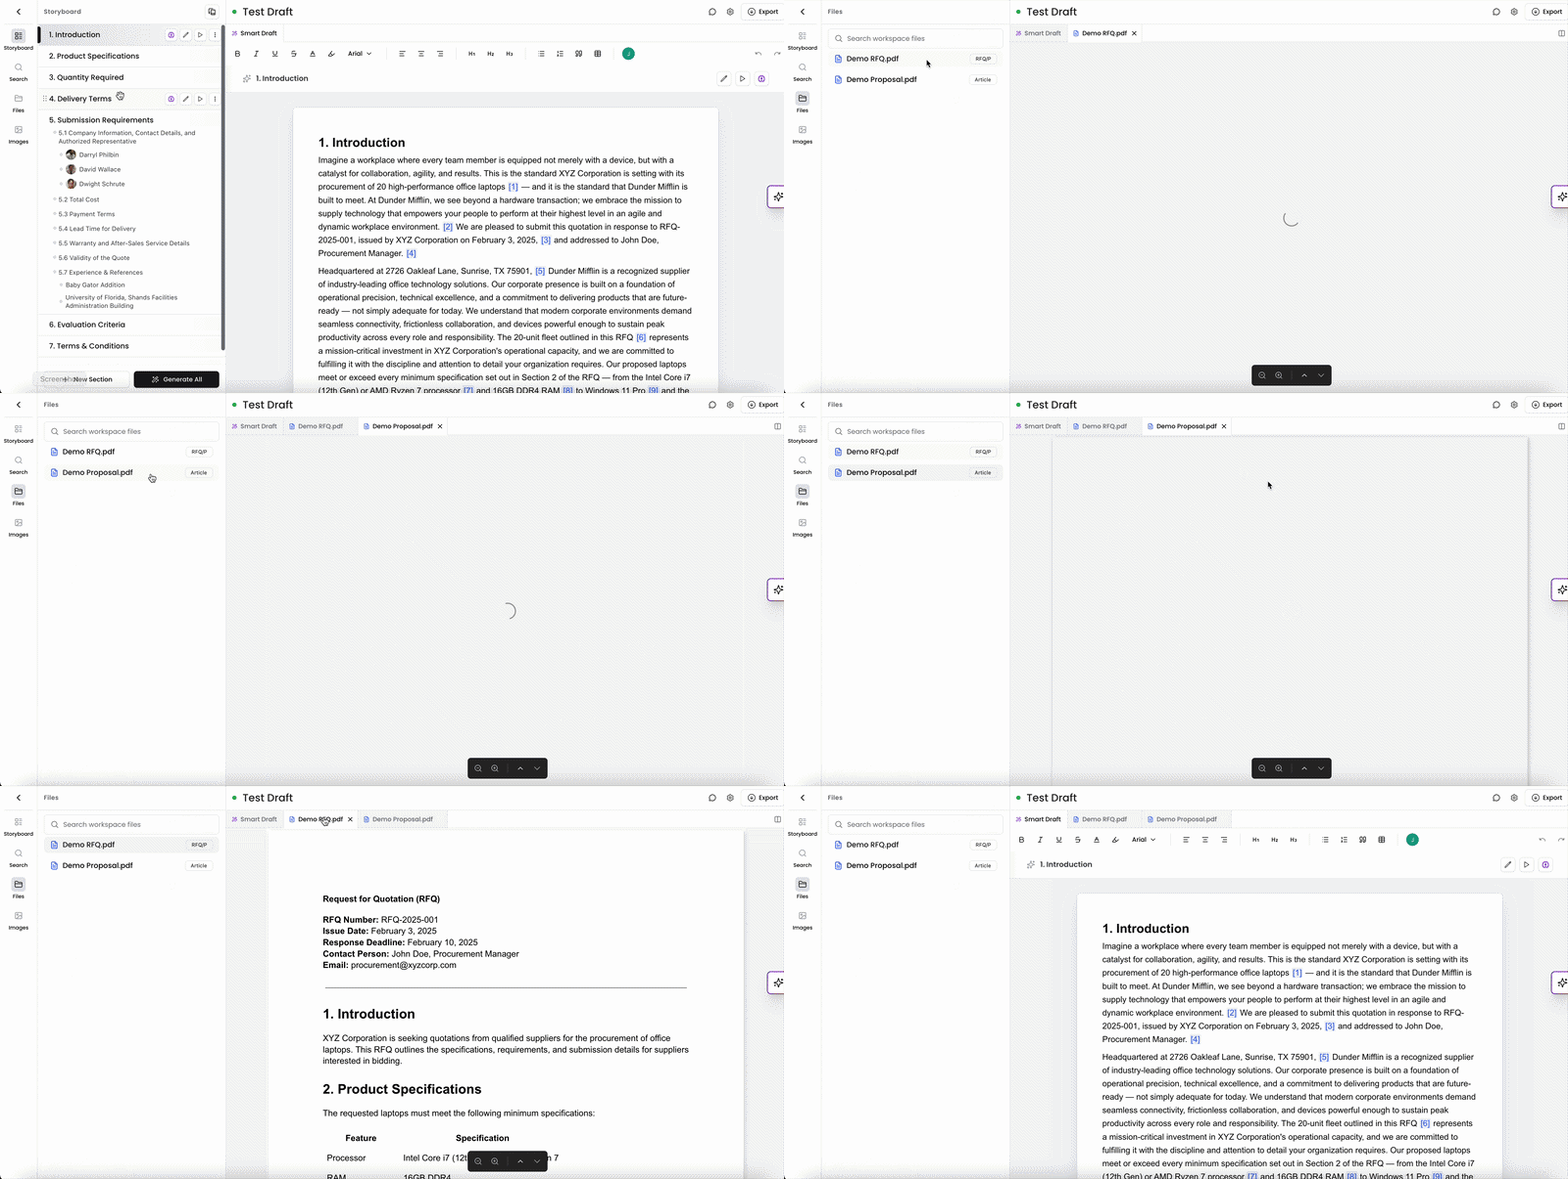
Click the Files icon in the left icon rail to open the Files panel, which lists every file attached to the current workspace — both RFP and Content files — regardless of which draft you have open.
Use the Search workspace files field at the top of the panel to filter the list by file name. Each file shows a Document Type badge (for example, RFQ/P or Article) to the right of its name.
Click a file to open it in a new tab next to your draft tab at the top of the editor. The file opens in a built-in viewer with zoom and page navigation controls. Click the × on the file's tab to close it and return to your draft.
Exporting Your Draft
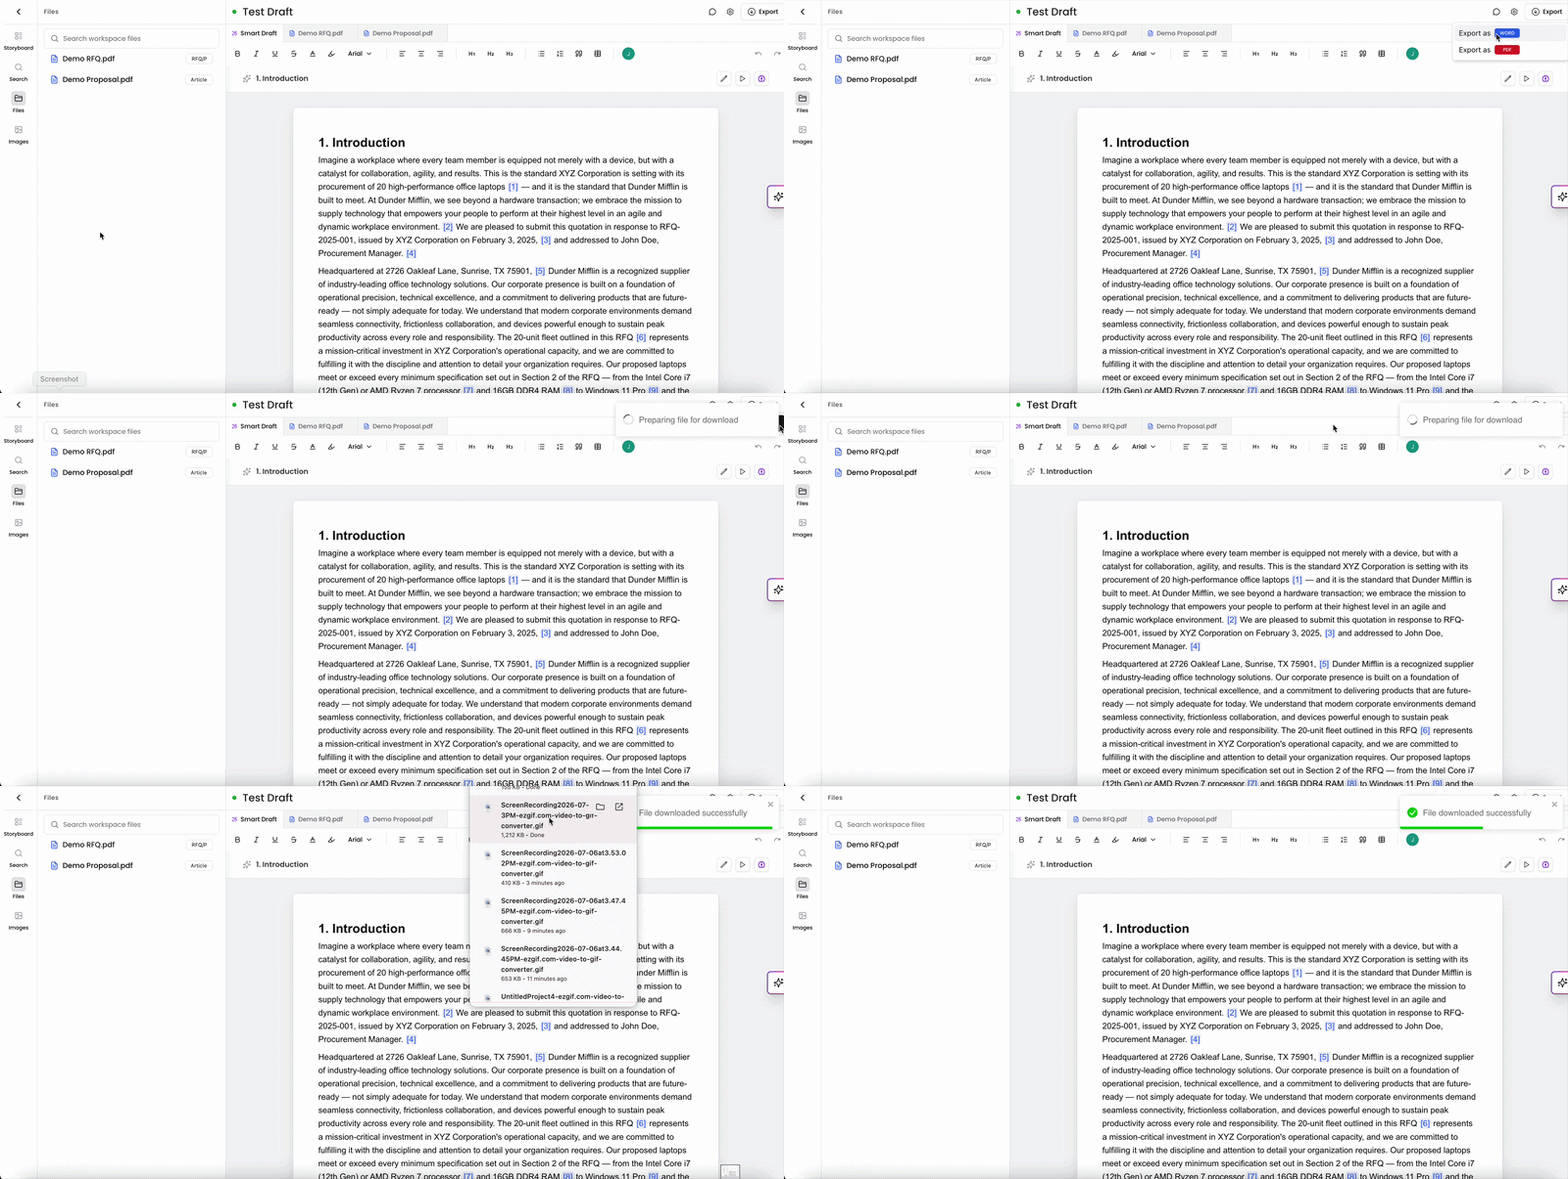
When your draft is ready, click the dropdown arrow next to Export in the top right. Two formats are available:
Export as WORD — downloads a .docx file
Export as PDF — downloads a .pdf file
Select your format and Kantiv will display a Preparing file for download spinner in the top right while the file is being generated. Once ready, a green File downloaded successfully confirmation appears and the file downloads to your device automatically.
You can always find more information on Workspaces in our Support Center. Please send any questions or feedback to Support@Kantiv.com.