Generating a Smart Draft
Last updated: July 15, 2026
As of July 2026, Kantiv has released a new version of Workspaces and Document Analysis. This article covers the new version of Workspaces and articles covering the Legacy version can be found in this collection.
Smart Drafts use AI to automatically generate proposal content based on your RFX document, workspace files, past proposals, and your organization's content library. You can generate a Smart Draft at any point after creating a workspace, and you can customize the data sources, tone, language, and instructions before generation begins.
Before You Begin
You'll get the best results from a Smart Draft when your workspace has:
An RFX document uploaded (via the RFP section or the Create Pursuit flow)
Supporting reference files added to the Content section
Relevant past projects linked in the Projects section
Team members added in the People section
These steps aren't required, but each one gives the AI more context to draw from. Linked people and projects are automatically pulled into the draft as appendix sections.
Creating a New Draft
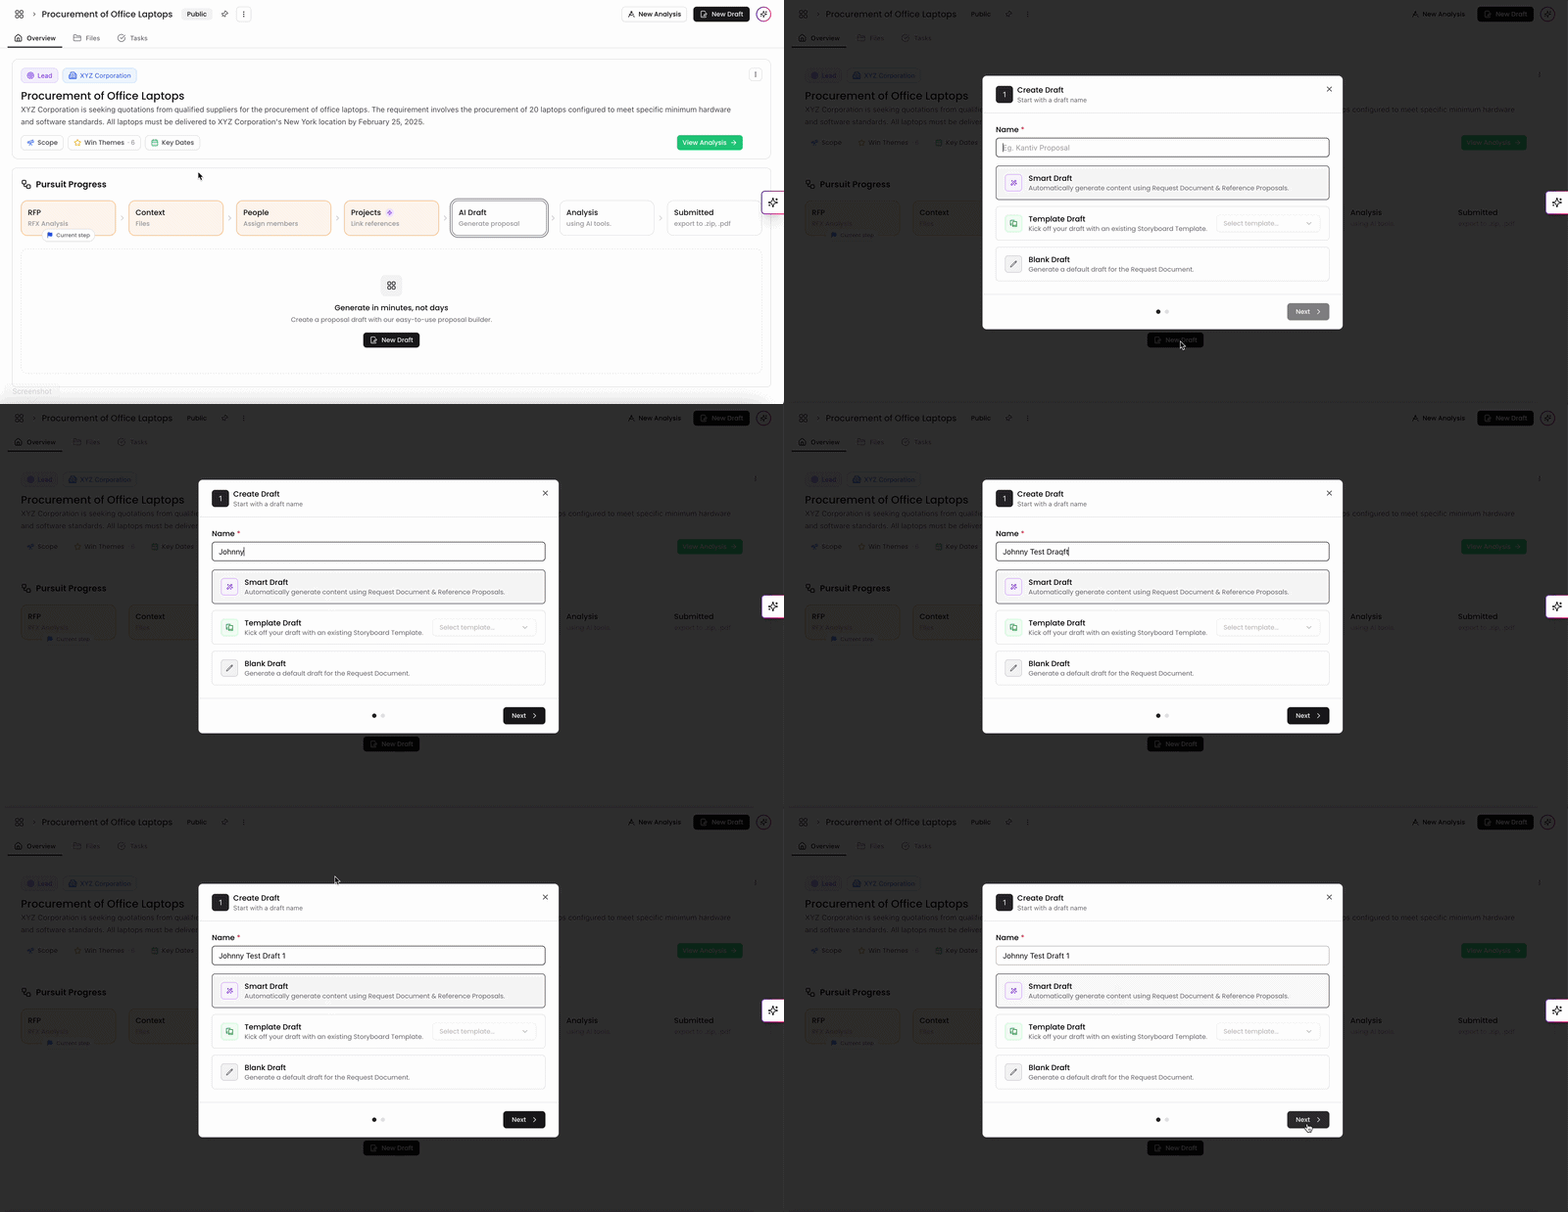
From anywhere in your workspace, click New Draft in the top right.
The Create Draft dialog opens. Enter a name for your draft in the Name field.
Select a draft type:
Smart Draft — Automatically generates content using your RFX document and reference proposals. Best for most pursuits.
Template Draft — Starts from an existing storyboard template. Select a template from the dropdown.
Blank Draft — Generates a default structure from the RFX document without additional AI customization.
Click Next.
Configuring Advanced Settings
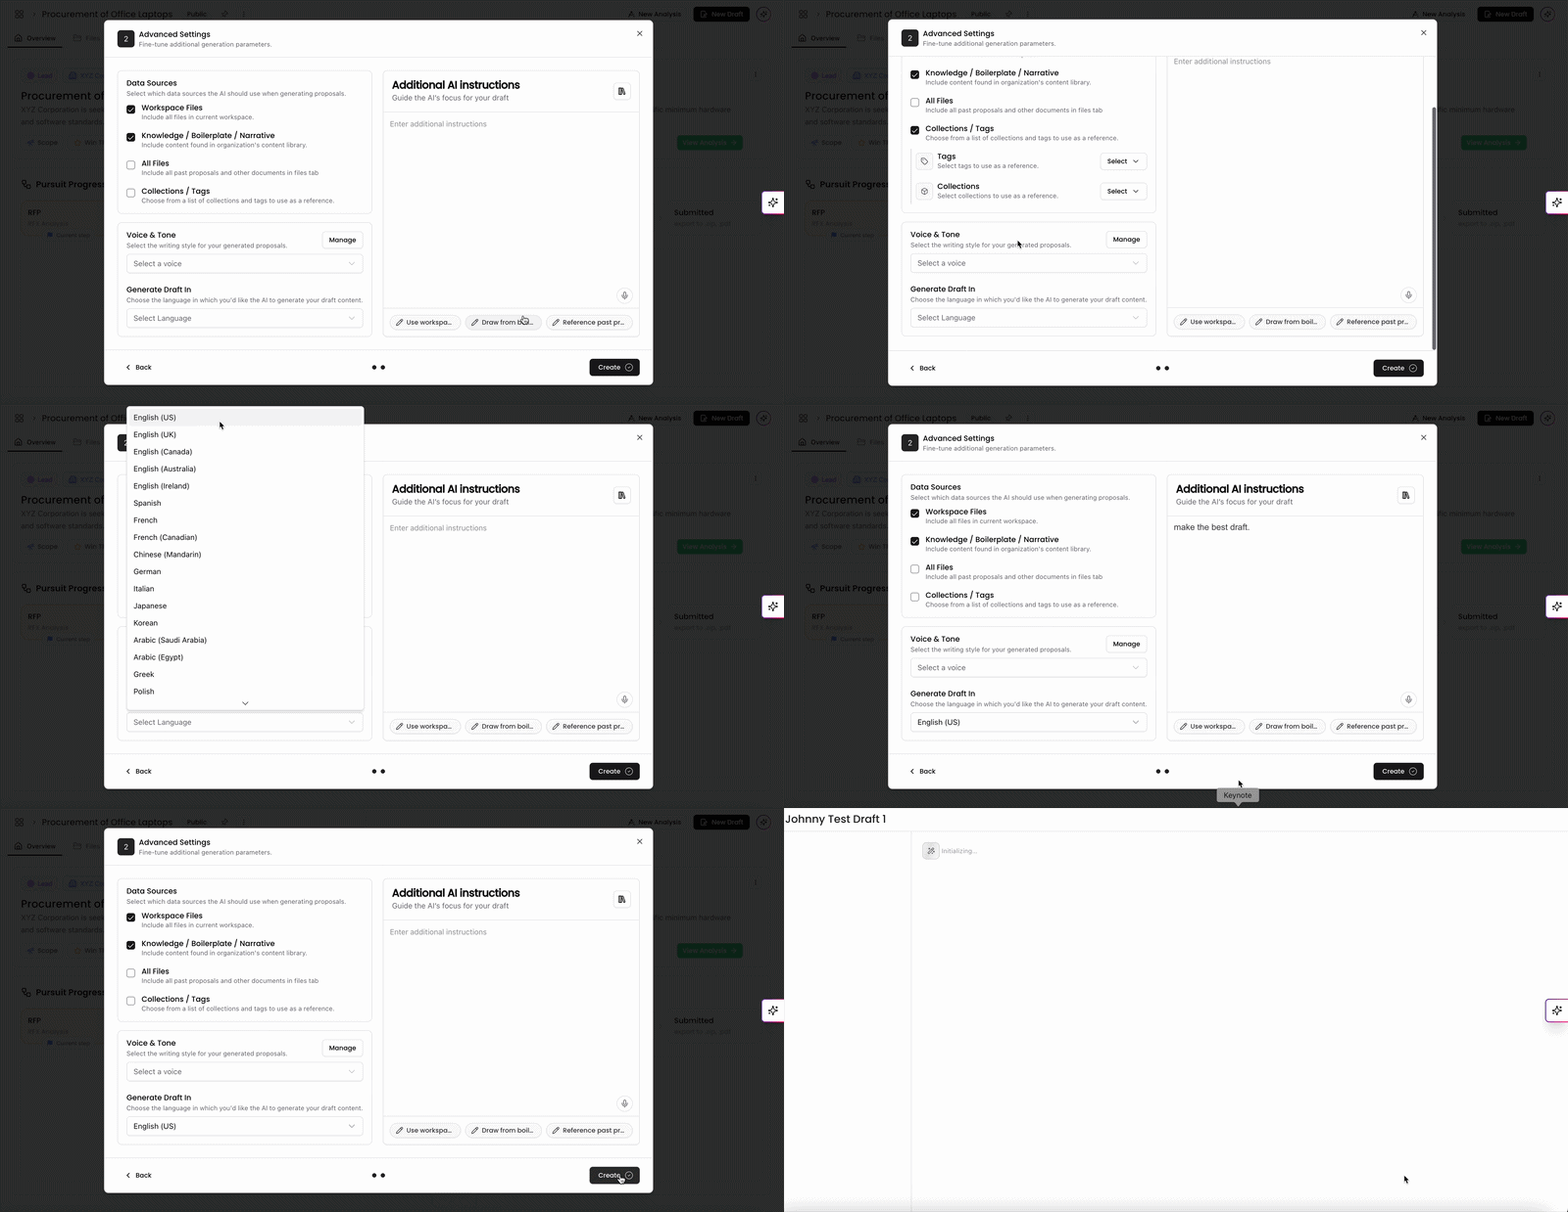
The Advanced Settings screen lets you control how the AI generates your draft.
Data Sources — select which content the AI should draw from:
Workspace Files — all files attached to this workspace (selected by default)
Knowledge / Boilerplate / Narrative — content from your organization's content library (selected by default)
All Files — all past proposals and documents in your Files tab
Collections / Tags — specific collections or tags from your library
Voice & Tone — select a writing style for the generated content. Click Manage to configure or add new voices to your organization.
Generate Draft In — choose the output language for your draft (e.g., English (US)).
Additional AI instructions — enter any specific guidance for the AI in the text field. For example: focus areas, sections to emphasize, or formatting preferences. Use the prompt chips below the field to quickly insert common instructions:
Use workspace: instructs the AI to prioritize workspace files
Draw from boilerplate: instructs the AI to lean on your organization's standard content
Reference past project: instructs the AI to reference linked past projects
Generation Progress
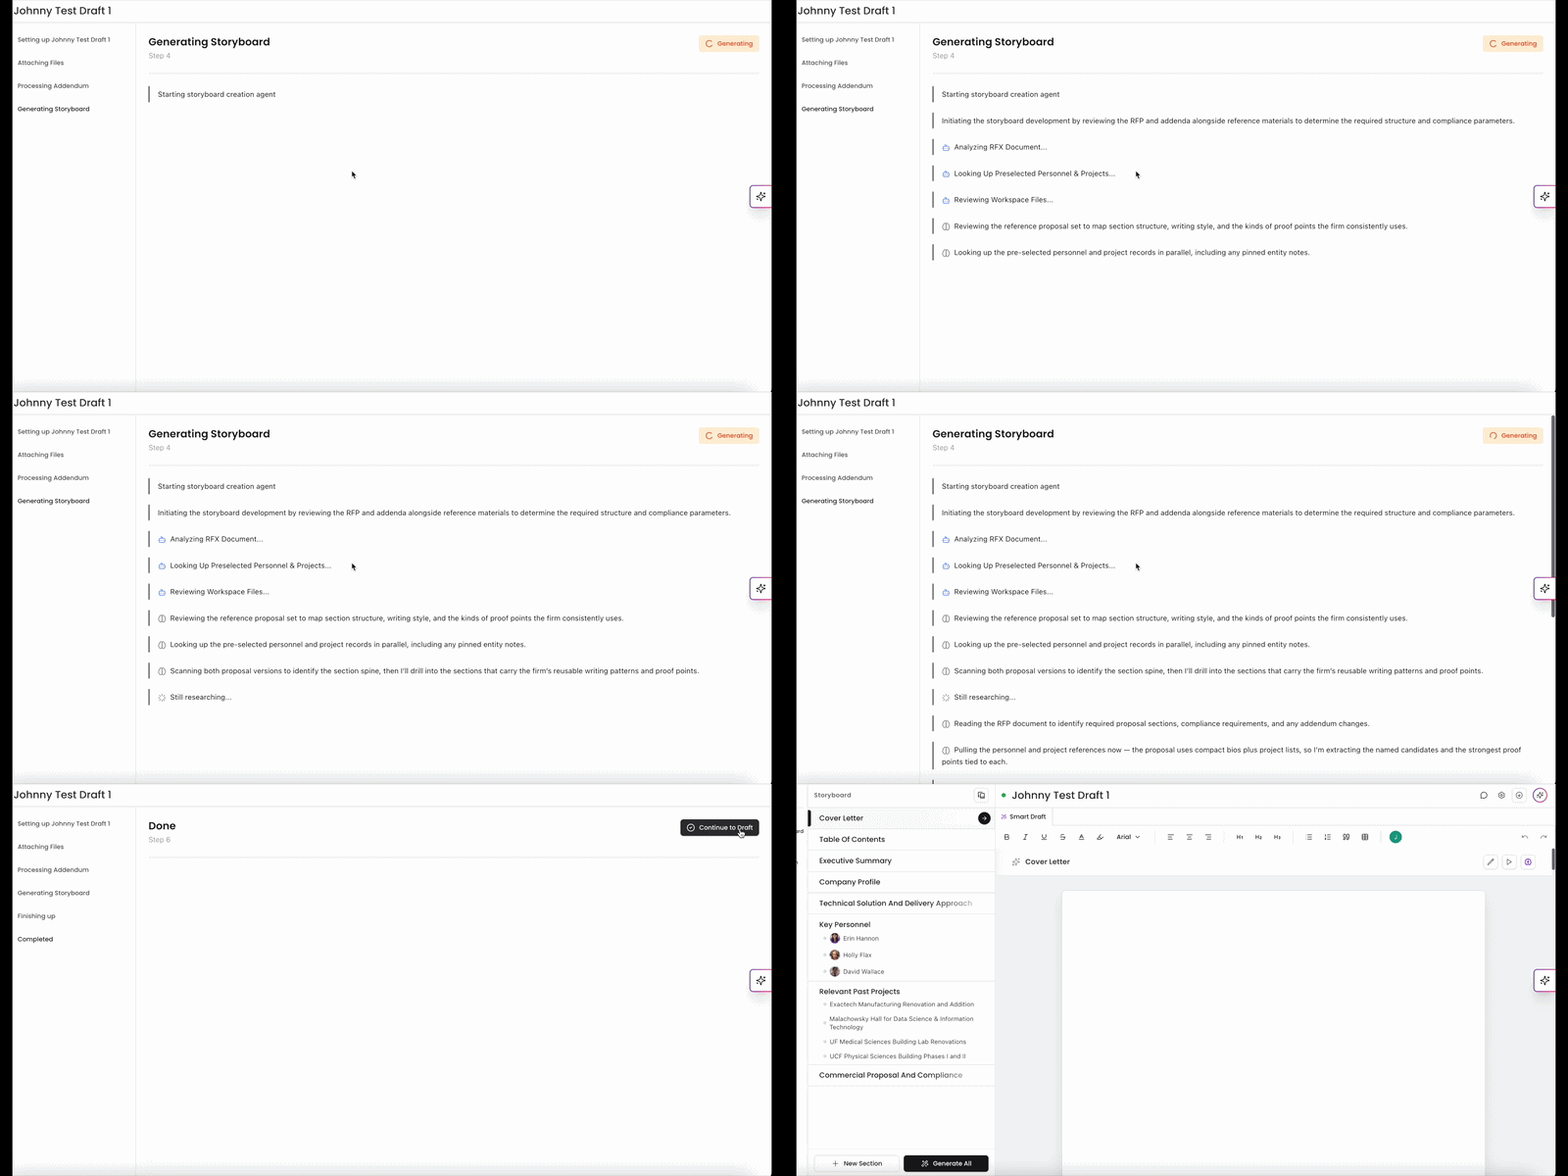
Click Create to begin generation. Kantiv processes your draft in five steps — you can track progress on screen:
Setting up [draft name] — configuring the draft parameters
Attaching Files — attaching your RFX and workspace files to the generation context
Generating Storyboard — building the draft structure
Finishing up — finalizing the storyboard and preparing the editor
Completed — generation is complete
When all steps show a checkmark, click Continue to Draft to open the draft editor.
You can always find more information on Workspaces in our Support Center. Please send any questions or feedback to Support@Kantiv.com.