Creating a New Workspace
Last updated: July 15, 2026
As of July 2026, Kantiv has released a new version of Workspaces and Document Analysis. This article covers the new version of Workspaces and articles covering the Legacy version can be found in this collection.
You can create a new workspace in Kantiv in two ways: by uploading an RFX directly from the Dashboard, which automatically creates a workspace and begins analyzing the document; or by creating a blank workspace from the Workspaces list and adding files afterward. Both paths land you in the same workspace environment.
Create a Workspace from the Dashboard
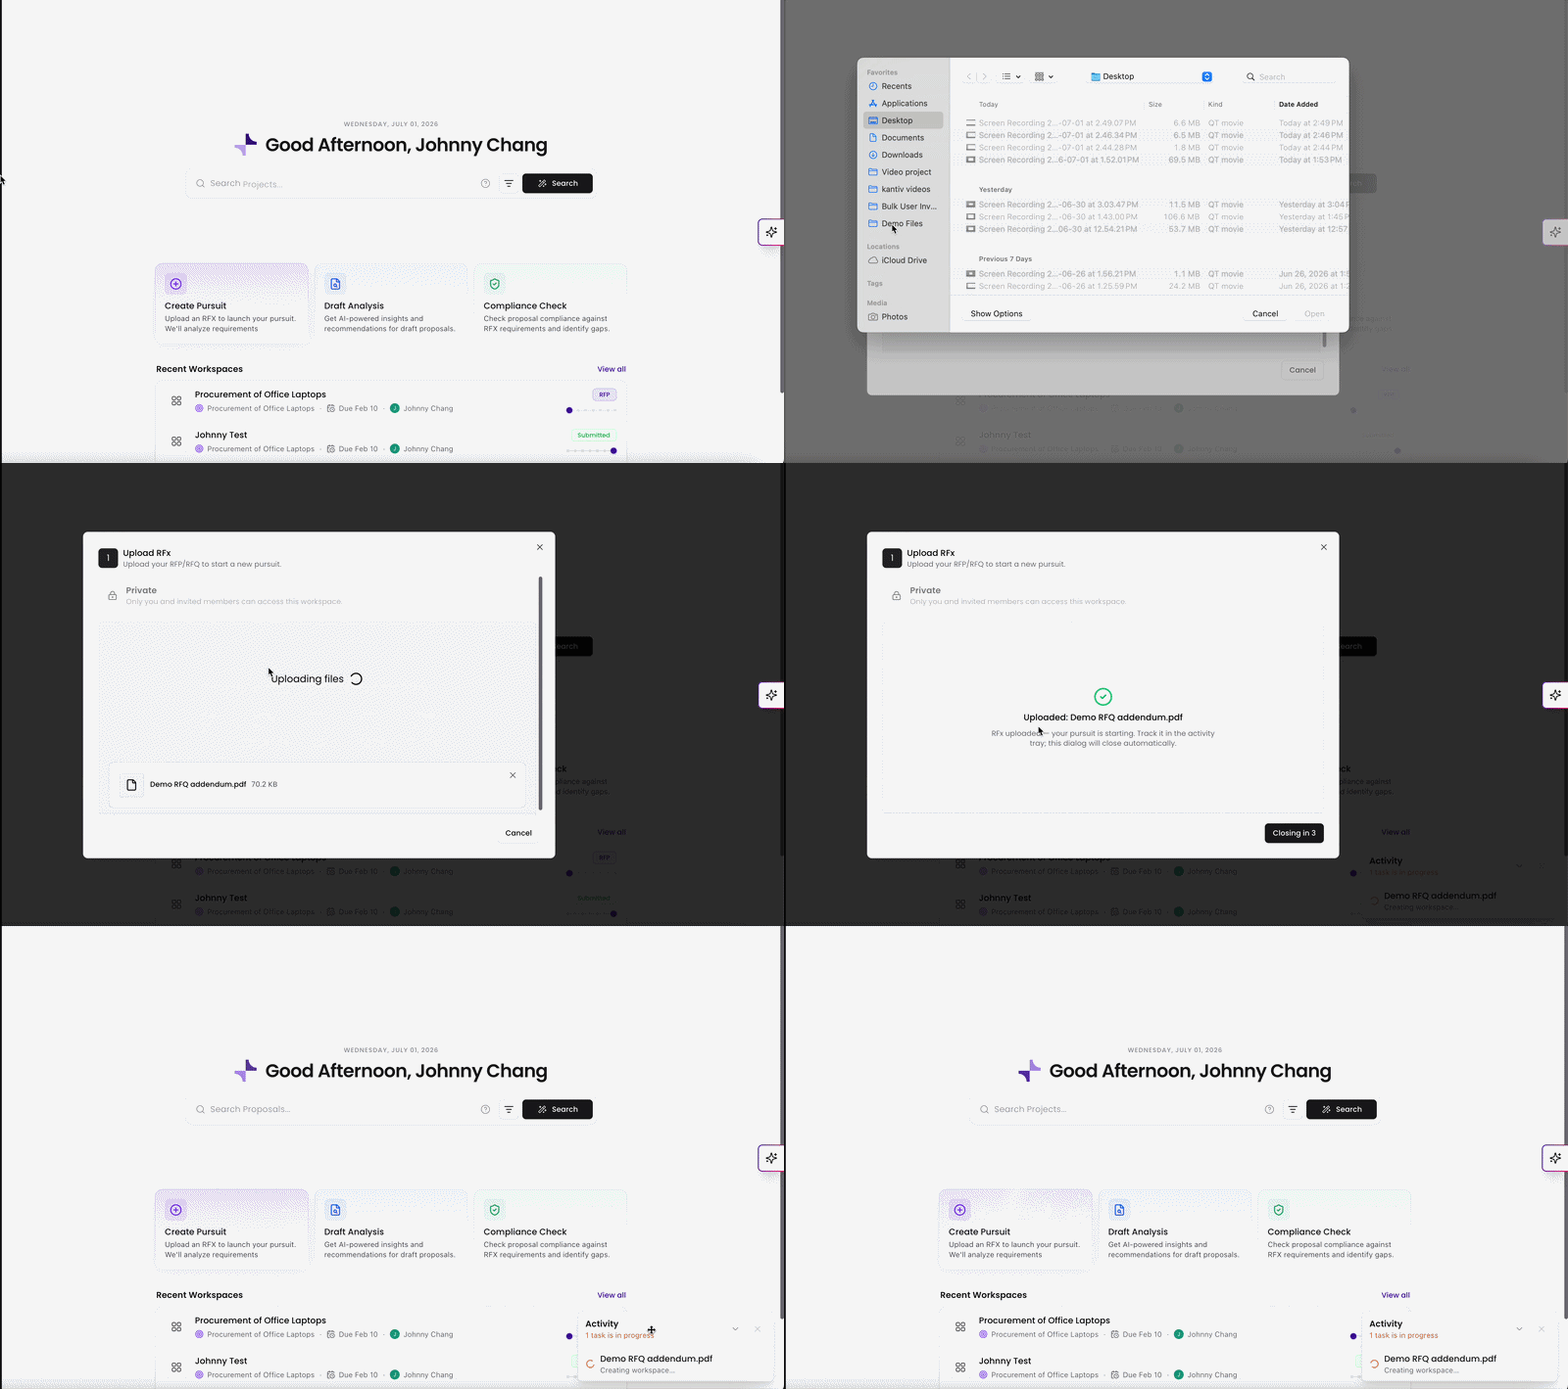
The Dashboard's Create Pursuit shortcut is the fastest way to start a new workspace when you already have an RFX file ready.
From the Dashboard, click Create Pursuit.
The Upload RFx dialog opens. Optionally, toggle Private on to restrict access to invited members only.
Upload your RFX document using one of the following options:
Drag and drop the file into the upload area
Click browse files to select from your device
Click My Device, Google Drive, Box, Dropbox, or OneDrive to import from a connected source
Once your file is selected, the upload begins automatically. A progress bar shows upload status. When complete, you'll see a confirmation screen: Uploaded: [filename]. RFx uploaded — your pursuit is starting.
The dialog closes automatically after a brief countdown. Kantiv creates your workspace in the background and you can track progress in the Activity tray.
Your new workspace will appear in the Workspaces list once processing is complete. Click it to open the workspace Overview, where the RFX file will appear in the RFP section of the Pursuit Progress pipeline.
Create a Workspace from the Workspaces List
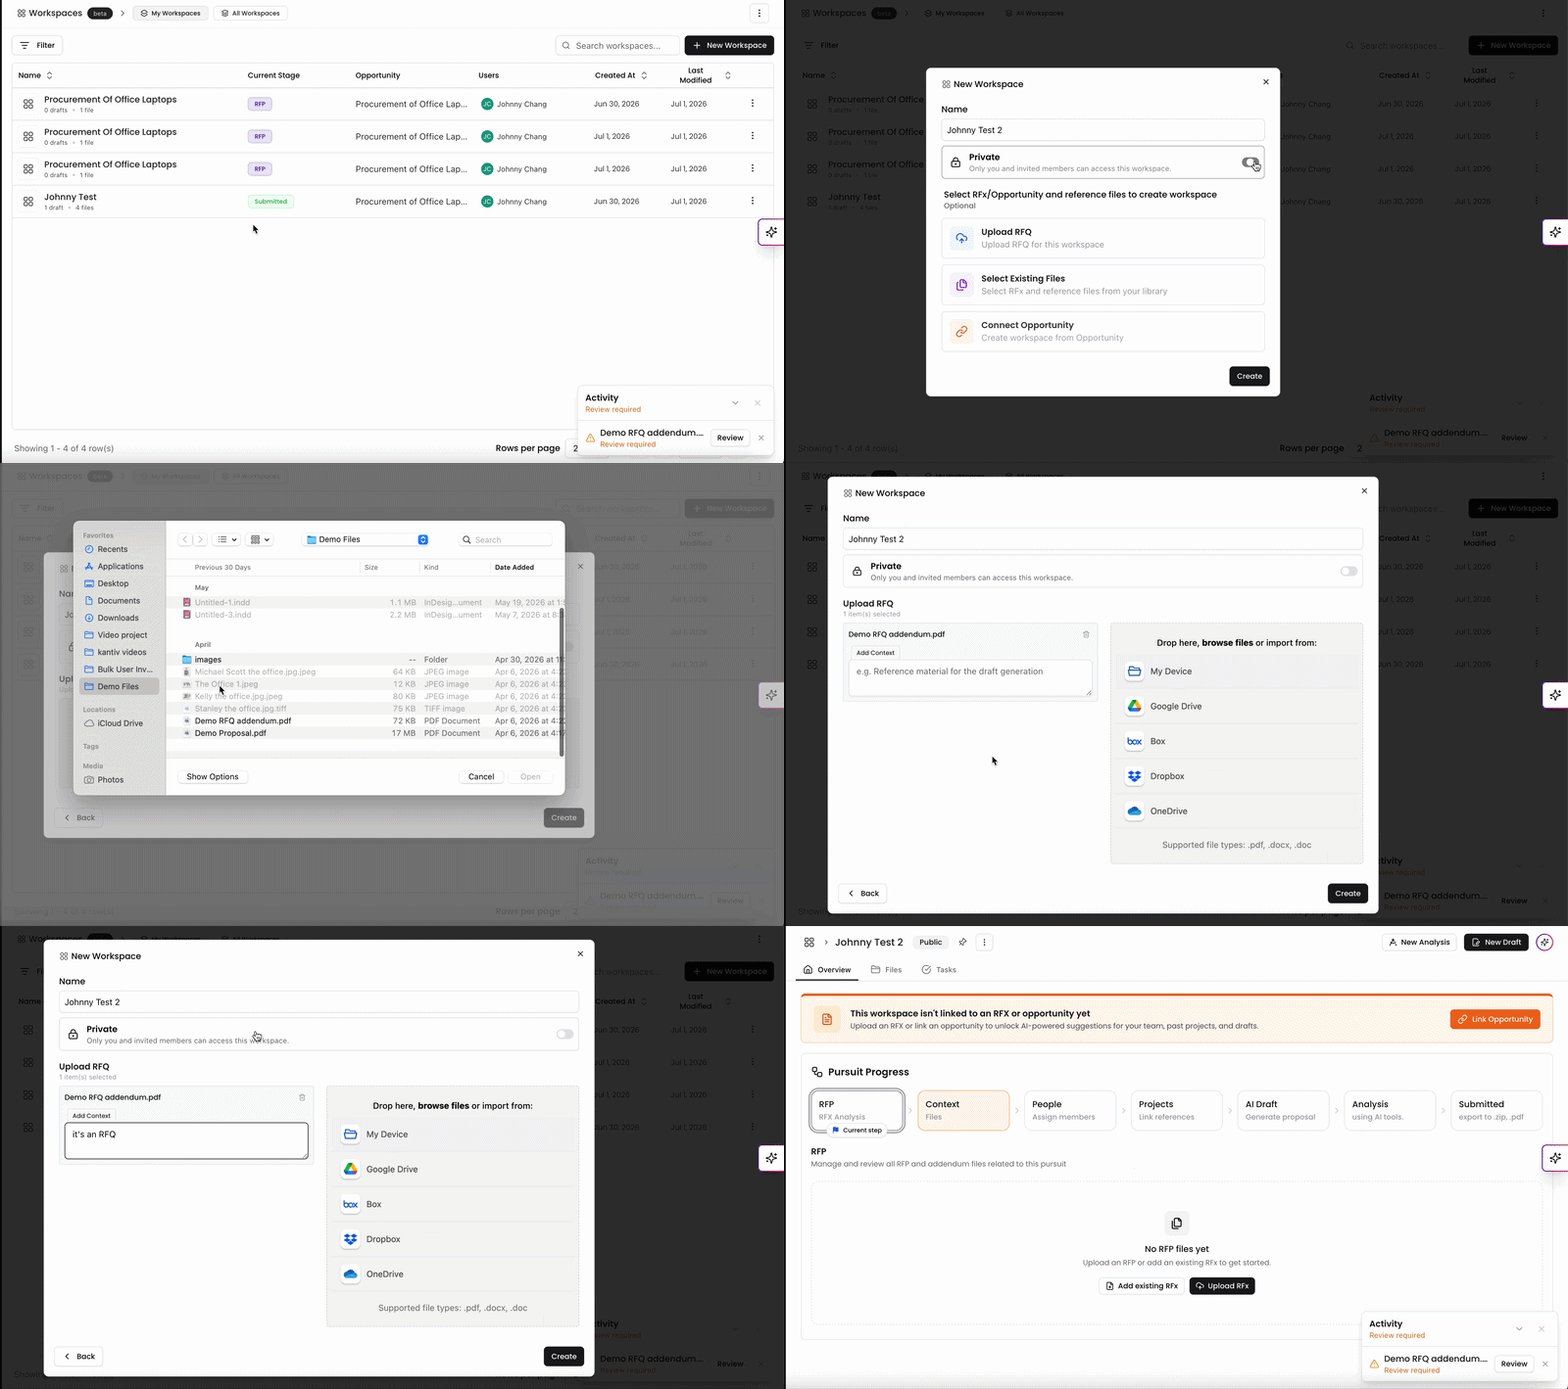
Click Workspaces in the left navigation menu.
Click + New Workspace in the top right.
Enter a name for your workspace in the Name field.
Optionally, toggle Private on to restrict access to invited members only. By default, workspaces are public to your organization.
Optionally, attach an RFX or reference files to your workspace at creation:
Click Select Existing Files to choose from your Kantiv library. Files are filtered by RFx and Other tabs. Check the files you want to include. Click Additional context to files to add notes alongside any file before creating. Click Create when ready.
Click Connect Opportunity to link an existing opportunity from your library. Search by name or scroll the list, select the opportunity, and click Connect Opportunity.
Click Create.
You'll be taken directly to your new workspace's Overview page. If you attached files, they'll appear in the relevant pipeline sections. The Pursuit Progress pipeline shows RFP as the current step.
Once your workspace is created, the Overview page shows the Pursuit Progress pipeline and, if you uploaded an RFX, a banner will confirm whether the file is being scanned. AI suggestions for team members and past projects appear once scanning completes.
If you created a blank workspace without attaching an RFX or opportunity, you'll see a banner prompting you to link one. Click Link Opportunity to connect one at any time. You can still use all workspace features without a linked RFX, but AI-powered suggestions won't be available until one is connected.
You can always find more information on Workspaces in our Support Center. Please send any questions or feedback to Support@Kantiv.com.